

Most shower leaks do not show up the week the tile goes in. They show up eight months later, as a dark spot creeping across the ceiling downstairs or a soft patch in the subfloor nobody noticed until the grout started cracking.
By the time you see the damage, the problem happened long before, back when the waterproofing layer went in wrong, or got skipped in a spot nobody checks until it fails. Tile is not what keeps water out of your walls and floor. The membrane underneath is doing that job, and it only works if every seam, corner, and penetration gets treated correctly.
This is where a lot of DIY bathrooms go sideways. People research tile patterns and grout color for weeks, then rush the one step that actually protects the house. If you want to waterproof a shower before tiling the right way, the steps below walk through the parts that matter most, in the order you will actually do them, including the ones that are easy to miss on a first build.
1. Choose the Right Waterproofing Method for Your Shower

Not every shower needs the same waterproofing system, and picking blind is how people end up with the wrong one for their layout. Sheet membranes work well on flat, simple pan shapes. Liquid applied membranes flex into odd angles and curved benches without extra cutting. Foam board systems combine the pan and wall backing into one product, which saves steps but costs more upfront.
Think about your shower’s shape, your timeline, and your comfort with each application method before buying anything. A bench, a niche, or a sloped pan built from scratch usually points toward liquid membrane, since it moves with the shape instead of fighting it.
| Sheet Membrane | Liquid Membrane | Foam Board |
|---|---|---|
| Best for flat, simple pans | Best for curves, benches, niches | Best for new framing |
| Lower material cost | Mid range cost | Higher upfront cost |
| More seams to seal | Seamless once cured | Fewer separate steps |
2. Check Your Pre-Slope Before Anything Else Touches It
Here is a rule that saves a lot of regret: water needs a quarter inch of fall for every foot it travels toward the drain. If your pre-slope mortar bed is flat, or pitched the wrong way near a corner, water sits instead of draining, and standing water is exactly what breaks down a membrane over time.
Check the slope with a level in several spots, not just the center. Low spots near the walls are the ones people miss most, since the middle of the pan often looks fine even when the edges do not drain.
3. Waterproof the Drain Assembly First
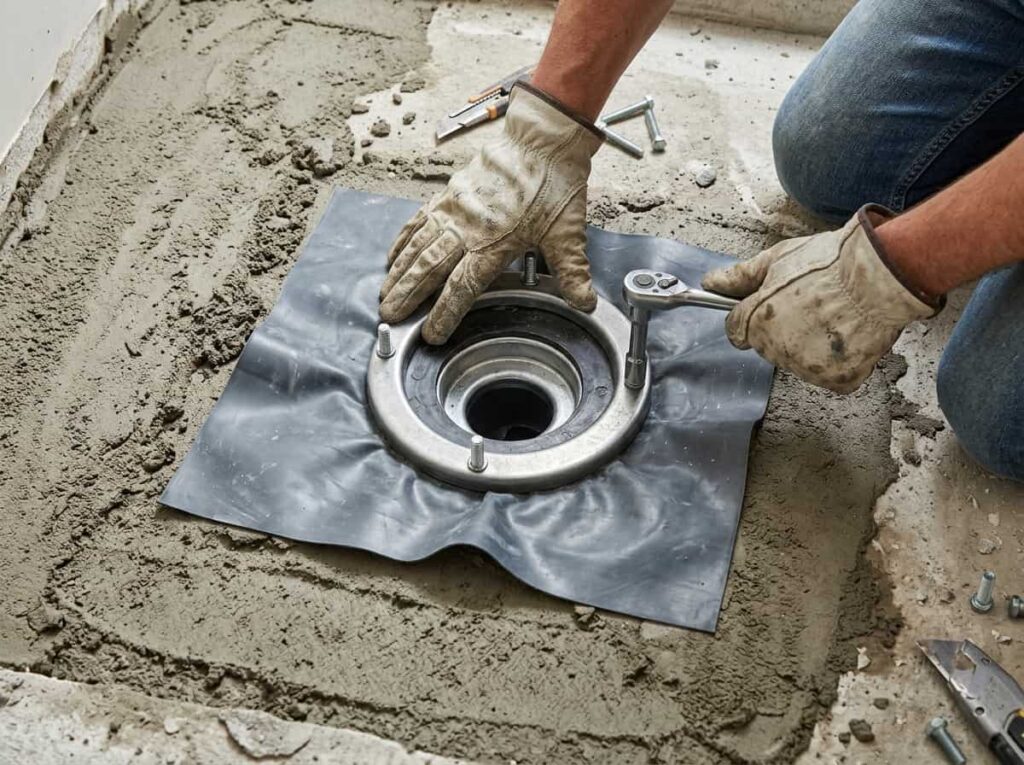
The drain is the part of the shower that gets waterproofed twice, once as part of the clamping drain assembly and again when the membrane ties into it. Skip either layer and you have built a funnel straight into the subfloor.
A two piece clamping drain needs the bottom flange sealed to the pre-slope, then the membrane folded down and clamped under the top piece before the strainer goes on. Do this step out of order and you will be pulling tile back out later to fix it.
💡 Quick Tip
Dry fit the drain assembly before any mortar goes down, so you know every piece lines up and tightens the way it should.
4. Treat Every Corner With Fabric or Preformed Pieces
A lot of people assume liquid membrane alone is enough at inside corners, since it is already waterproof. It is not enough on its own. Corners move slightly as a house settles, and a rigid membrane layer can crack right along that seam over time.
Waterproofing fabric or a preformed corner piece bridges that movement. Press the fabric into wet membrane, work out air bubbles with a trowel, then coat over the top once it sets. Preformed inside and outside corners do the same job with less mess, especially on your first shower build.
Embed fabric or a preformed piece at every inside and outside corner.
Smooth out air bubbles before the membrane cures.
Relying on membrane alone to bridge a corner seam.
Rushing past corners because they look sealed already.
5. Seal the Curb Like It’s Going to Flood
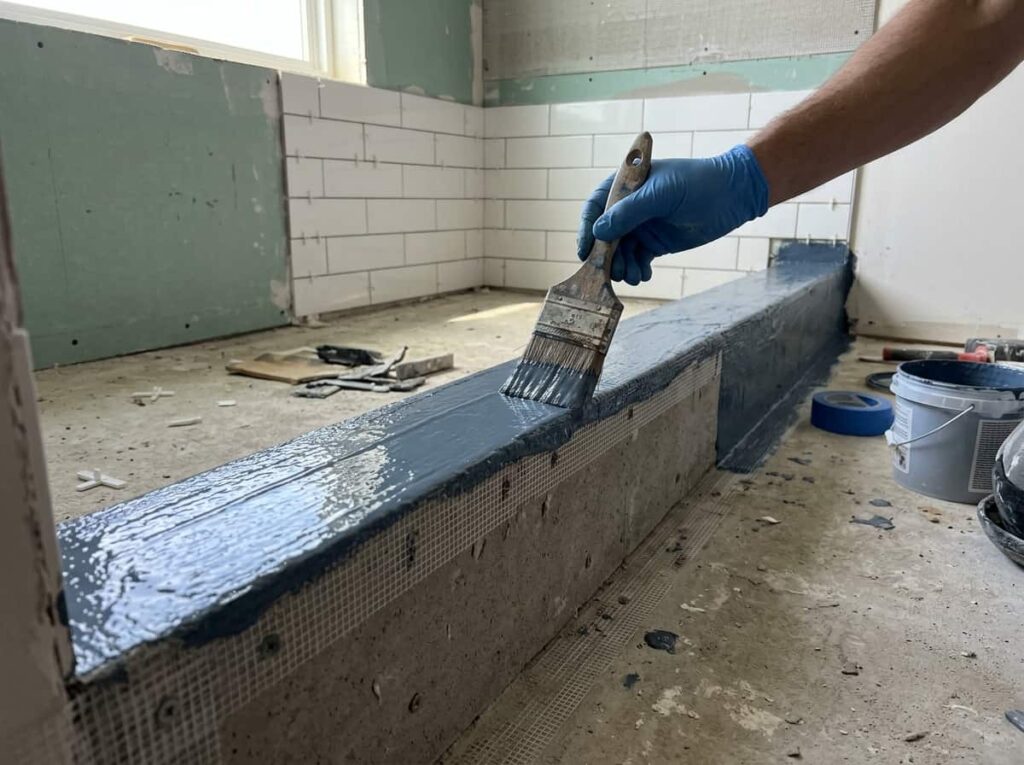
Treat the curb as its own small waterproofing project, because water pools against it from both sides, inside the shower and sometimes outside it during a long run.
Coat the top, both sides, and where the curb meets the wall and the pan. Wrap the corners where the curb meets the wall with extra fabric, since that joint takes the most stress. Five extra minutes here beats pulling tile later.
Coat the top surface of the curb completely, including the inside edge.
Wrap fabric around both corners where the curb meets the wall.
Tie the curb coating into the pan and wall membrane with a clean overlap.
6. Get the Niche Waterproof From the Inside Out
A built-in niche fails waterproofing checks more than almost any other spot in a shower, mostly because it has five extra seams where the wall plane does not. Top, bottom, two sides, and back all need coverage, and the inside corners need fabric just like the main shower corners do.
Work from the back of the niche outward. Coat the back first, then the top and bottom, then tie the side seams into the surrounding wall membrane with a solid overlap. A shelf or sloped bottom inside the niche also needs its own slight pitch so water does not sit on it.
7. Overlap Seams the Right Amount
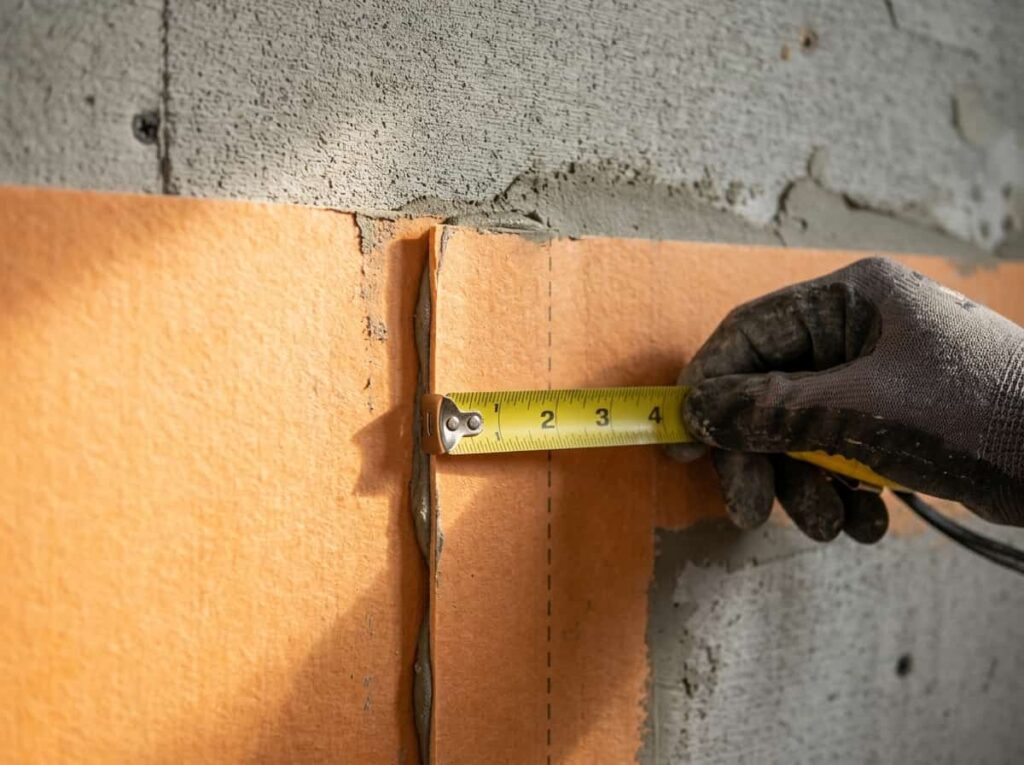
Most people guess at seam overlap, and guessing is how thin spots end up in the membrane. Sheet membrane seams need a consistent overlap, usually around two inches, pressed down with no air trapped underneath. Liquid membrane coats need to overlap the previous coat’s edge too, not just butt up against it.
Thin, rushed overlaps are weak points even when the rest of the application looks solid.
Before you move to the next section
8. Apply Liquid Membrane in the Right Number of Coats
One thick coat of liquid membrane is not the same as two thinner ones, even if the total product used looks similar. A single heavy coat can crack as it dries and often misses low spots that a second pass would catch.
Two thin coats, applied in different directions, cover more gaps than one thick coat ever will.
Let the first coat dry to the touch before rolling the second one on at a right angle to the first. That cross direction is what catches the thin spots a single pass tends to leave behind.
9. Don’t Let Screw Holes Become Leak Points

Backer board screws puncture the surface before the membrane ever goes on, and each one of those tiny holes is a potential path for water if it is not treated. This is an easy step to forget because the holes are small enough to ignore.
Coat directly over every screw head and seam tape joint as part of your regular membrane application, not as an afterthought pass at the end.
⚠️ Watch Out
Dozens of uncoated screw heads can add up to more leak risk than one bad corner seam. Check every single one.
10. Seal Every Pipe and Fixture Penetration
Compare a shower with sloppy penetration sealing to one done right, and the difference shows up fast once water starts running. Shower valves, shower arms, and any other pipe coming through the wall need a sealing gasket or boot made for that exact penetration, not just a smear of extra membrane.
Membrane smeared around a pipe with no real seal, gaps hidden under the rough coating.
A fitted gasket or boot sealed tight against the pipe, then coated into the surrounding membrane.
A loose fit around a shower valve is one of the most common leak sources inspectors find, even in otherwise solid work.
11. Run a Flood Test Before You Tile a Single Piece
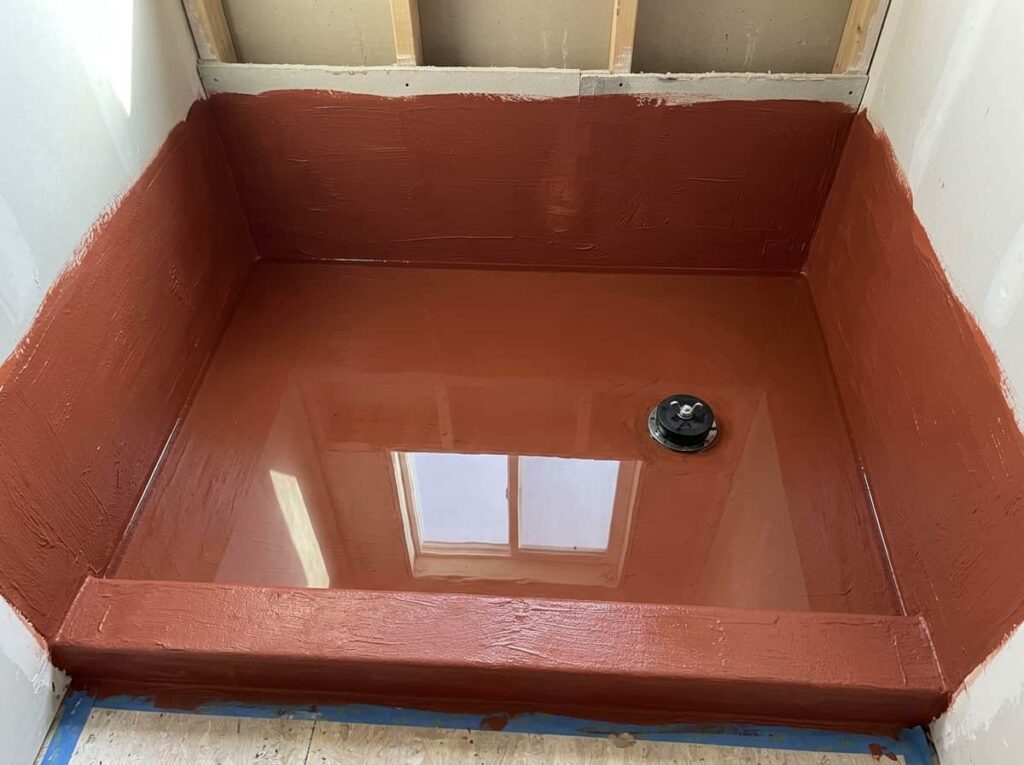
A flood test is the one step that tells you the truth before tile makes everything harder to fix. Plug the drain, fill the pan with a couple inches of water, and let it sit for 24 hours. Check the ceiling below or the access panel for any sign of moisture.
If you skip this step and the membrane has a weak spot, you will not find out until there is already tile, grout, and probably a finished floor on top of the problem.
Flood test checklist
12. Give the Membrane Time to Cure
Patience is the cheapest waterproofing step and the one people skip most often. Most liquid membranes need a specific cure window before they can hold up to standing water or tile adhesive, and that window is longer than most people expect, especially in a cold or humid bathroom.
Follow the manufacturer’s listed cure time before the flood test.
Keep the space ventilated but not cold while it cures.
Tiling the same day because the surface feels dry.
Running the flood test early to save a day.
Dry to the touch and fully cured are not the same thing, and tile adhesive applied too early can actually trap moisture against an undercured membrane.
13. Check Your Local Code Before You Call It Done
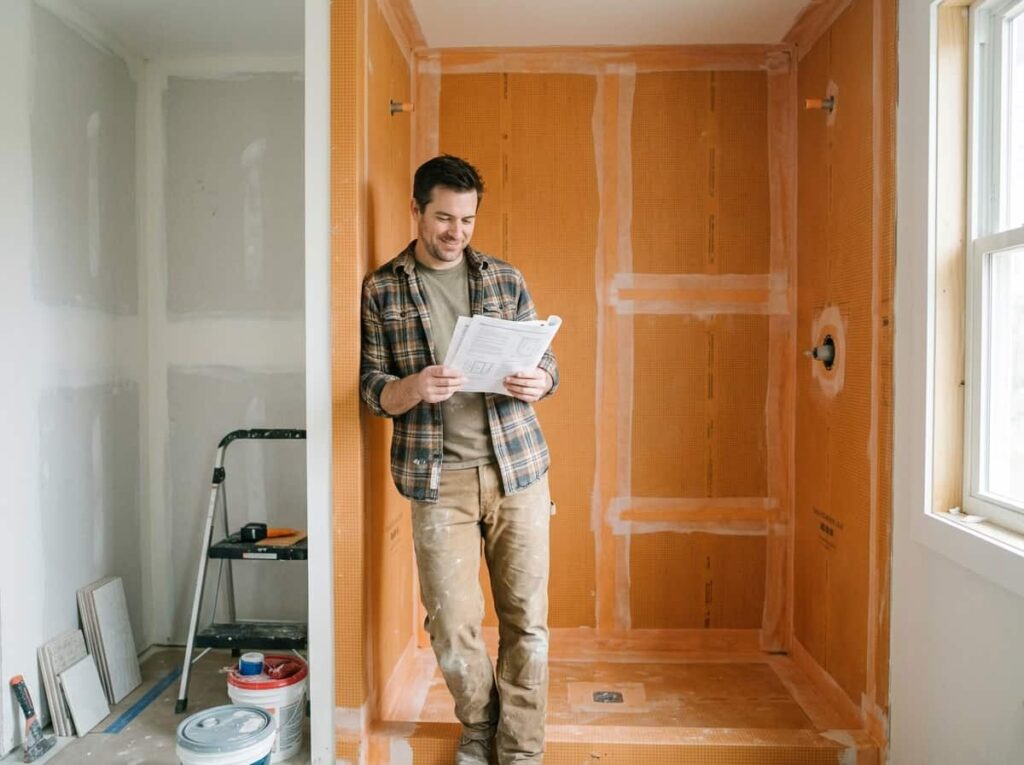
Waterproofing requirements are not identical everywhere, and this is the step most DIY guides leave out entirely. Some areas require a specific membrane rating, a minimum pan height, or an inspection before the walls get closed up with tile.
A quick call to your local building department, or a look at their published residential code, tells you exactly what is required in your area before you are too far along to change anything.
- ▸Ask if a waterproofing inspection is required before tile goes up.
- ▸Confirm the minimum required curb or pan height for your area.
- ▸Keep your membrane product data sheet in case an inspector asks.
Conclusion
Waterproofing a shower before tiling is not the glamorous part of the project, and nobody saves a pin of a flood test. But it is the part that decides whether your tile work lasts for decades or starts showing problems within a year.
Every step here, from checking the pre-slope to giving the membrane its full cure time, protects the same thing: the structure behind the tile that nobody sees again once the project is finished. Go slow through the corners, the niche, and the penetrations, since those are the spots that fail first when they get rushed.
Get this part right and the rest of the build, the tile pattern, the grout color, the fixtures, gets to be the fun part instead of a second chance at fixing a mistake. Save this list for the next time you are ready to waterproof a shower before tiling, so you have every step in one place when you need it.
Leave a Reply