

Herringbone bathroom tile is the kind of detail people notice before they notice anything else in the room. It reads as intentional, a little bit expensive, and nothing like the tile everyone else is using. Yet plenty of homeowners talk themselves out of it, assuming the pattern only works with a big budget and a contractor who has laid it a hundred times before.
That is not really how it works. Herringbone bathroom tile is more forgiving than it looks, and the pattern does most of the heavy lifting on its own. What changes the final result is the tile size you choose, the color pairing, the grout line, and whether the herringbone stays on the floor or climbs a wall, wraps a niche, or frames a single accent zone.
This list runs through fifteen ways to use herringbone in a bathroom, starting with the classic black and white marble version and moving into warmer, less expected color combinations. Some ideas stick to the floor. Others put the pattern somewhere you might not have thought to try it yet.
1. A Black and White Marble Herringbone Floor That Still Feels Fresh, Not Retro
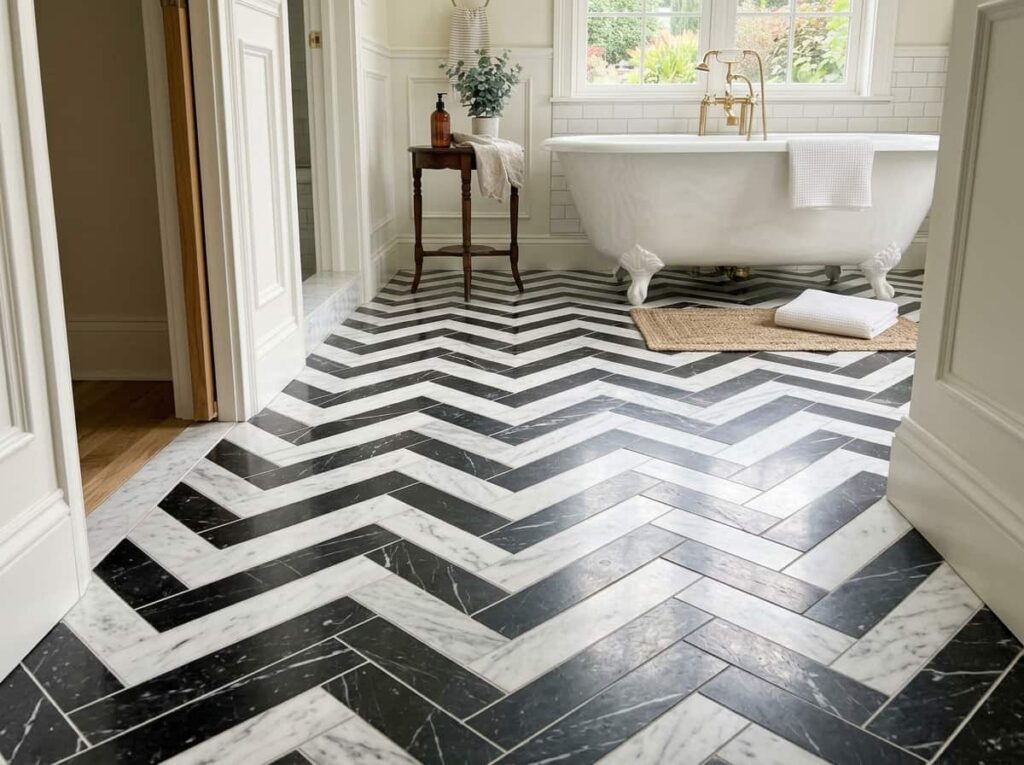
Black and white herringbone gets lumped in with old checkerboard floors, but the two barely resemble each other. The diagonal lay and the marble veining give it a softer, more expensive look than a flat checkerboard ever manages.
A few things keep it from reading dated:
- A honed marble finish instead of a glossy polish
- Narrow pieces, closer to one or two inches wide
- Grout close to the tile color instead of stark white
Skip the wide-set tile version if you want the classic look. It flattens the pattern and starts to feel more like a hallway than a bathroom floor.
2. The Grout Color Choice That Makes or Breaks a Herringbone Pattern
Most grout mistakes with herringbone happen at the color stage. White grout looks crisp in photos, but on an actual floor it grays out fast and makes every seam in the pattern jump out, which is the opposite of the clean look you’re going for.
A closer grout match does two things:
- Lets the pattern read as one continuous surface
- Hides everyday grime a shade or two longer between cleanings
Go a shade darker than the tile if you’re worried about staining down the road, not lighter.
💡 Quick Tip
Test your grout sample inside the actual bathroom, not under store lighting. Fluorescent bulbs shift grays warmer than daylight, so a color that looks neutral in the showroom can read yellow once it’s on your floor.
3. Should the Herringbone Go on the Walls Instead of the Floor? A Quick Reality Check
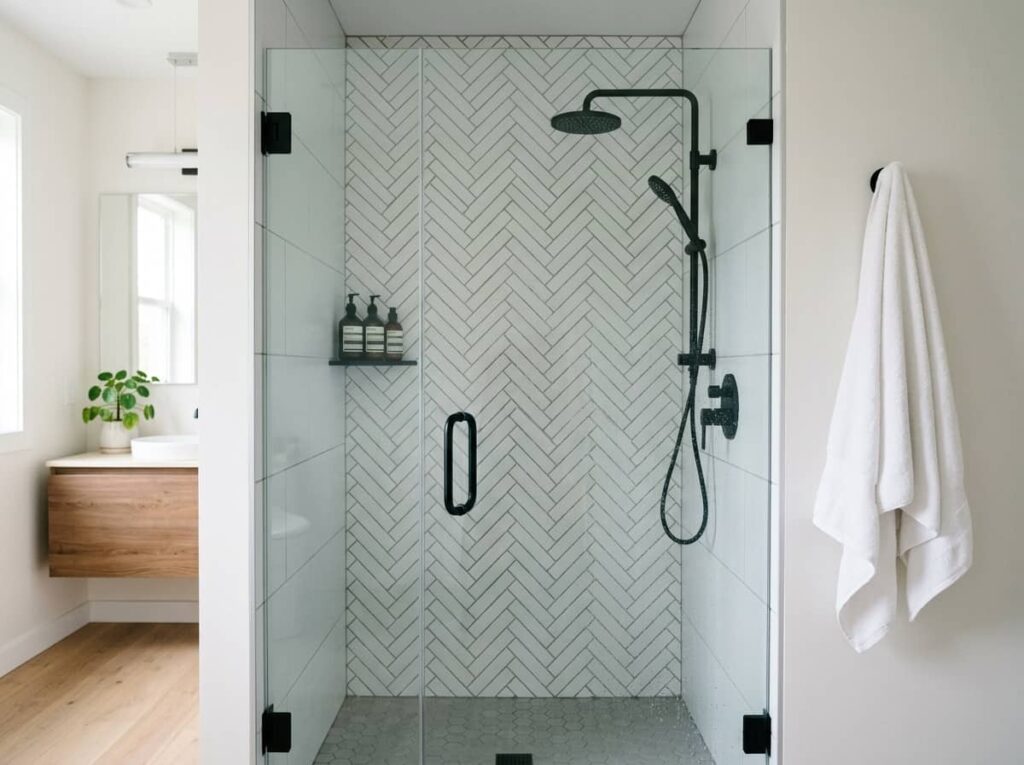
Floor herringbone and wall herringbone solve different problems, and mixing them up is an easy way to overspend on tile you don’t actually need. Floor herringbone earns its keep in higher traffic, higher moisture areas, since it wears well and hides water spots better than large format tile.
Wall herringbone works best in smaller doses: a shower surround, a half wall behind the vanity, or a single niche. Covering every surface in the room tends to compete with itself instead of feeling intentional.
Use wall herringbone on one surface, like a shower surround or a single feature wall.
Keep the remaining walls plain tile or simple paint so the pattern has room to stand out.
Covering every wall in herringbone along with the floor.
It competes with itself and starts to feel busy instead of designed.
4. Wide-Plank Herringbone: The Softer, More Modern Take on the Pattern
Wide-plank herringbone swaps the tight zigzag of classic herringbone for long rectangular pieces, usually six or eight inches, laid in the same angled pattern. The effect reads calmer and more contemporary, closer to a wood look floor than a formal tile floor.
It works especially well in bathrooms that already lean modern or minimal, where a busier small format pattern would clash with everything else in the room.
Measure the room. Wide-plank herringbone needs at least a 6 by 8 foot floor area to read as a pattern instead of a jumble.
Check your ceiling height. Rooms under 8 feet tend to feel calmer with the wider plank than with tight classic herringbone.
Pick a matte finish. Wide planks in a glossy finish can look more like a hallway runner than a bathroom floor.
5. Using Herringbone as a Tiled “Rug” to Make a Small Powder Room Feel Bigger
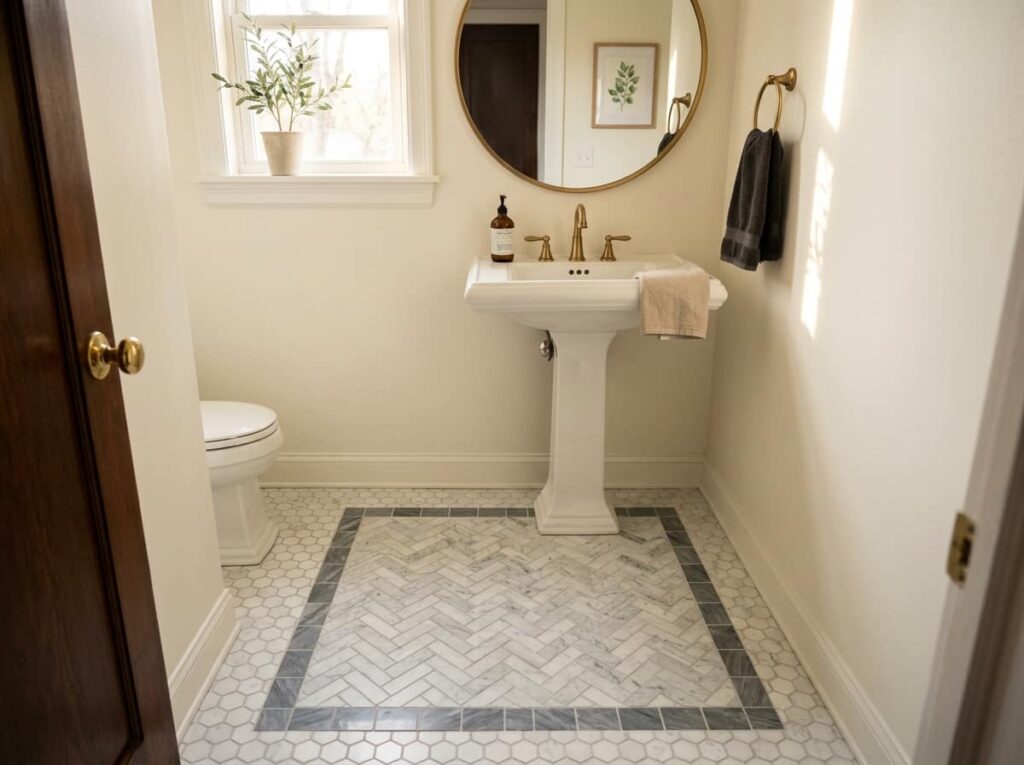
A small powder room covered floor to wall in the same tile can feel like a box, especially once you add a pedestal sink and a mirror that eats up half the wall. Full coverage herringbone solves the pattern problem but doesn’t always solve the size problem.
Instead, lay a herringbone panel in the center of the floor like an area rug, bordered by a plain tile in a matching or slightly darker tone. The border reads as a frame, and framing a small space almost always makes it feel more finished instead of smaller.
One busy pattern running wall to wall in a 5 by 7 foot room, with no visual break for the eye to rest on.
A bordered herringbone panel in the center, framed by plain tile that gives the room a defined edge and a finished feel.
6. Two Grout Layouts, Two Totally Different Looks: A Side-by-Side
Running grout at a wide, deep-set joint versus a tight, barely-there joint changes the entire mood of a herringbone floor, and most people never compare them side by side before choosing. A generous grout line, around 3/16 inch, breaks the pattern into clear individual pieces and leans traditional. A tight joint, closer to 1/16 inch, blurs the seams and reads as one continuous woven surface, which suits a more modern bathroom. Neither is wrong, but they live very differently once the floor is finished, so ask your installer for a sample board of both before you sign off.
| Wide Grout Joint | Tight Grout Joint |
|---|---|
| Each tile piece reads clearly on its own | Pattern blurs into one woven surface |
| Leans traditional and formal | Leans modern and streamlined |
| Grout color choice matters more | Tile color and veining do more of the work |
7. Where Hexagon Tile Meets Herringbone: A Transition Zone Worth Copying
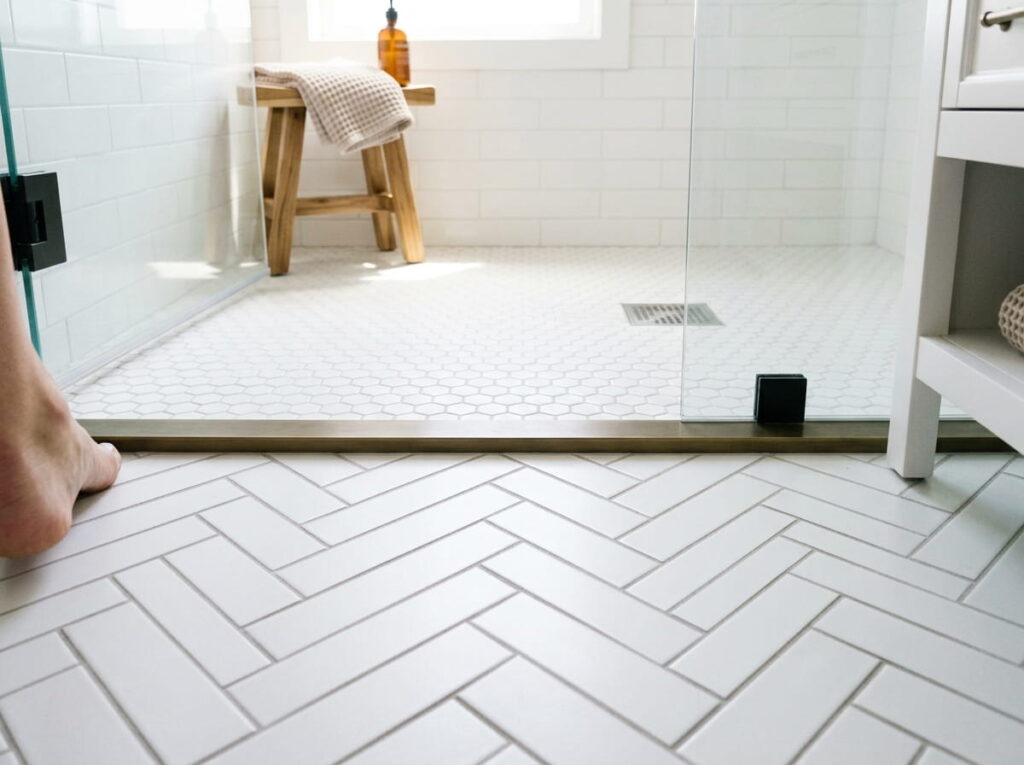
The spot where two flooring patterns meet is usually the first thing your eye catches when you walk into a bathroom, and pairing hexagon tile with herringbone at a doorway or wet zone turns that seam into a design choice instead of an afterthought. Run the herringbone through the main floor and switch to hex tile right at the shower threshold or a closet transition. The contrast in shape keeps both patterns readable instead of blending together, and it signals a change in zone without needing a strip of metal trim to do the work for you.
Let a shape change, not a metal strip, mark where one flooring zone ends and another begins.
8. Warming Up the Pattern With Terracotta and Clay Tones
Herringbone reads cooler and more formal by default, mostly because of how often it shows up in black, white and gray. Warm it up with terracotta, clay or a soft rust tone and the same pattern feels grounded and lived in instead of showroom-perfect. Pair it with a wood vanity, brass hardware and a linen shower curtain and the whole room leans more like a sunlit courtyard than a hotel bathroom. This combination works especially well in bathrooms that get good natural light, since warm tones can go flat and heavy under dim fixtures alone.
Before you commit to the warm palette
9. Running the Herringbone Diagonally Into a Curbless Shower
Keep the herringbone running in one continuous diagonal line from the main floor straight into a curbless shower, with no threshold or transition strip to interrupt it. The trick is matching the tile thickness and slope so the pattern doesn’t skip a beat crossing into the wet area. Done right, the floor reads as one uninterrupted surface and the shower disappears into the room instead of announcing itself as a separate box. It takes more planning at the framing stage, since the shower pan needs to be built to the same height as the surrounding subfloor.
10. Pairing Herringbone Floors With Brass or Matte Black Fixtures
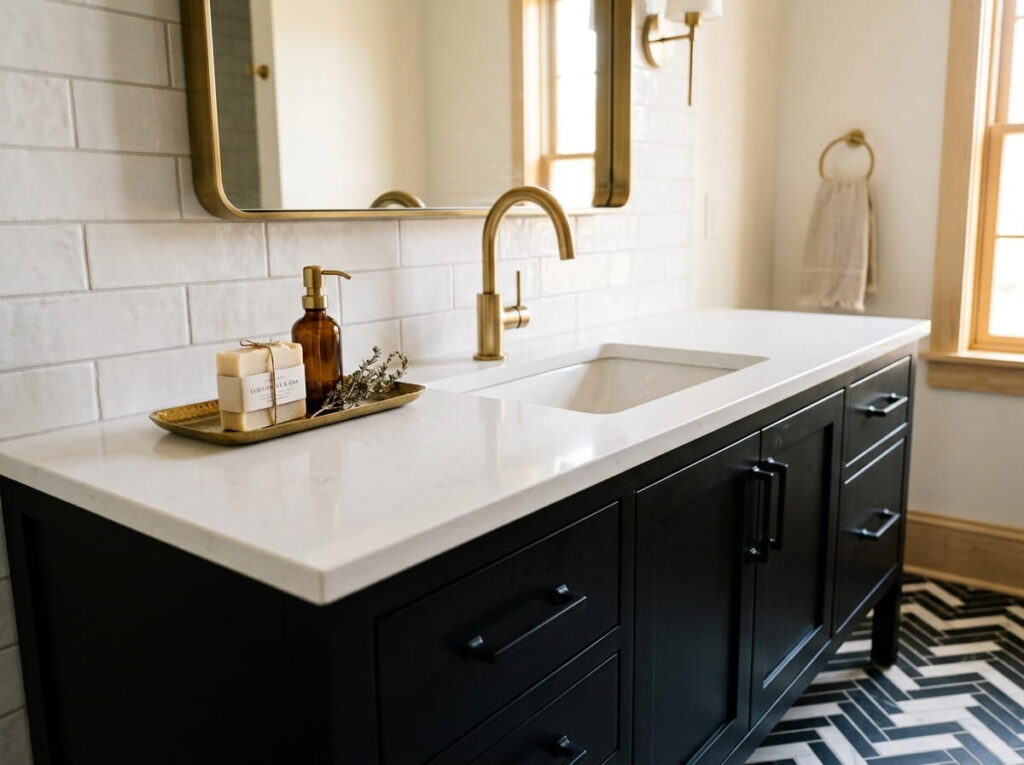
Matte black fixtures against a black and white herringbone floor can tip into looking flat, since the eye has nowhere warm to land in an all cool-toned room. Brass or unlacquered brass fixtures do more work here, picking up the warmth in the grout or the veining in marble tile and giving the space a focal point that isn’t just the floor pattern. A mix of both, brass on the faucet and matte black on hardware, tends to read the most intentional rather than matched from a single finish family.
💡 Quick Tip
Bring a fixture sample to the tile showroom, or hold your tile sample under the actual fixture finish at home, before buying every piece of hardware in one finish.
11. What a Herringbone Wet Room Actually Costs You in Time and Skill
People assume herringbone in a wet room is basically the same job as a herringbone floor with a drain added, and that assumption is where budgets go sideways. A sloped, waterproofed wet room floor needs every angled tile cut to follow the slope toward the drain, which means far more custom cuts than a flat installation. Factor in a longer install window and a tile setter who has specifically done sloped herringbone before, not just flat floors.
12. A Herringbone Accent Wall Behind a Freestanding Tub
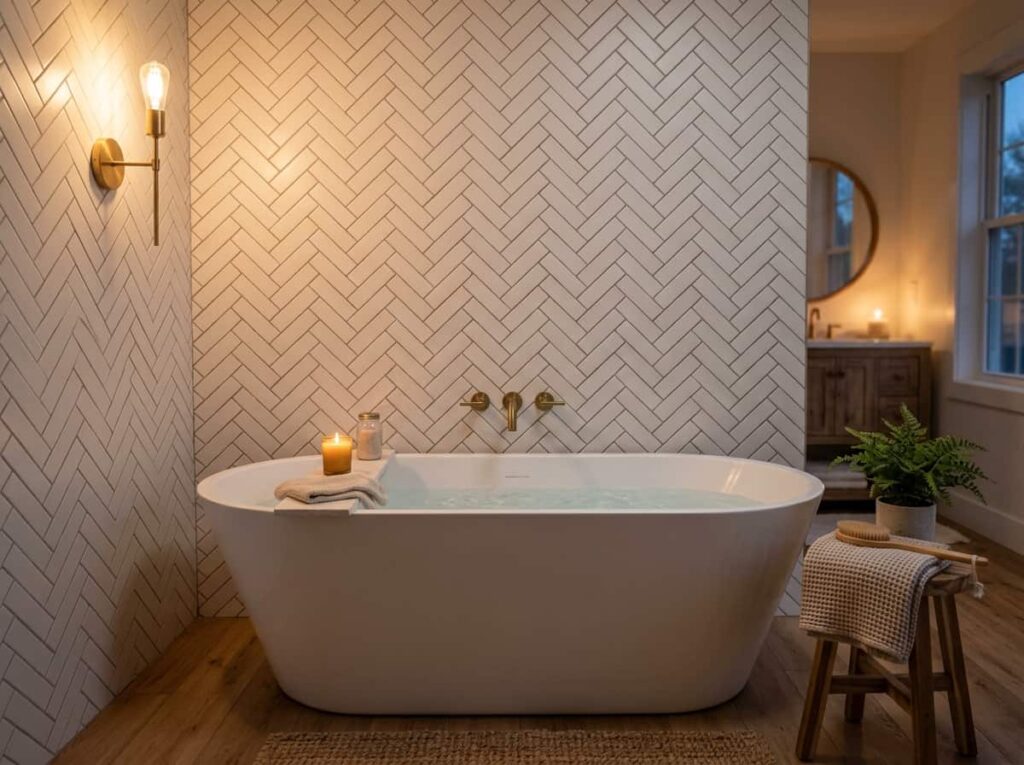
A tiled headboard, essentially, right where the tub backs up against the wall. It gives a freestanding tub a reason to sit where it does instead of looking like it was placed in an empty corner because there was nowhere else to put it.
What makes this version work:
- Stopping the tile at a clean height, usually just above where the tub’s back curve ends
- Keeping the rest of the walls plain so the tub wall reads as the focal point
- Using a slightly darker tile than the floor so the wall recedes rather than competes
This is a small square footage project, which makes it a reasonable place to try a tile that felt too expensive for the whole floor.
- ▸Works best behind a freestanding, not built-in, tub
- ▸Pairs well with a single sconce mounted on the tile
- ▸Costs less than full floor coverage in the same tile
13. Two-Tone Herringbone: When Alternating Dark and Light Tiles Works (and When It’s Too Busy)
The mistake with two-tone herringbone almost always comes down to contrast level, not the idea itself. A near-even split of dark and light tiles in a small bathroom can start to vibrate visually, especially under bright overhead lighting. The pattern works much better when one tone clearly leads and the second tone shows up as an accent, not an equal partner.
Use roughly a 70/30 split, one dominant tone and one accent tone.
Reserve the strongest contrast for a smaller zone, like a border or a niche.
A near-even 50/50 split across a small bathroom floor.
Under bright lighting it reads busy instead of graphic.
14. Framing an Arched Niche So It Echoes the Herringbone Below
A rectangular shower niche next to a herringbone floor is fine, but an arched niche tiled in the same pattern makes the two surfaces feel like they were designed together instead of picked separately. The curve softens the sharp diagonal lines of the floor and gives the eye a second place to land.
Frame the niche with a curved top during the rough-in stage, before any tile goes up.
Use smaller herringbone pieces inside the niche so the pattern can bend around the arch cleanly.
Match the grout color inside the niche to the floor, not the surrounding shower tile.
Ask your installer to mock up the arch on paper first. It is one of the easier details to get wrong on the first cut.
15. Herringbone Halfway Up the Wall, Paint Above: The Classic Wainscot Combo
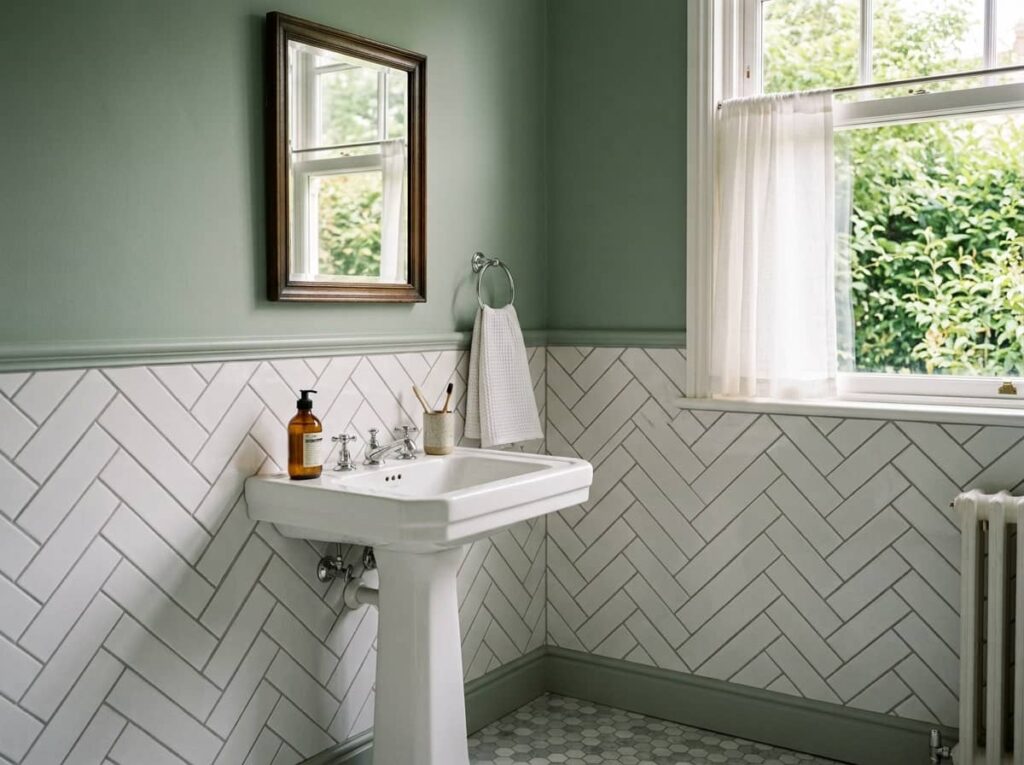
There’s a version of this that shows up in older European bathrooms, tile stopping at a clean line around chair-rail height with plain painted wall above it. It reads calmer than floor-to-ceiling tile and costs noticeably less, since you’re covering half the wall instead of all of it.
Plain tile floor, plain painted walls, nothing to tie the two together.
Herringbone floor and a matching half-wall wainscot, painted color above chosen from the grout tone.
Conclusion
Herringbone bathroom tile rewards patience more than it rewards a big budget. Whether you go classic black and white marble, warm terracotta, a half-wall wainscot, or a curved niche that echoes the floor, the pattern does most of the visual work on its own once the grout color and tile size are dialed in.
The easiest place to start is smaller than you think: a powder room floor, a single accent wall behind the tub, or a niche you were already planning to tile anyway. From there, the bigger moves, a curbless shower or a full wet room, make more sense once you have seen how the pattern behaves in your own light and layout.
If any of these herringbone bathroom tile ideas caught your eye, save this list so it’s easy to find again when you’re ready to pick tile.
Leave a Reply