
A small shower can feel like a phone booth with a door that fights you. The door swings into the room you need to walk through, the glass fogs up, and every tile seam seems to shout that the space is tight. The good news is that small does not have to mean closed in. A few clear choices about doors, glass, tile, and fixtures can make a narrow stall feel open and calm, even when the floor plan has not changed at all.
That is the goal here: small bathroom shower ideas that open up the space without a budget-breaking remodel. Some changes are about what you see first, like glass and tile lines. Others change how the shower works day to day, like the niche and the water flow. Each idea is distinct, so pick the ones that fit your bathroom.
Every bathroom has a few fixed limits, like the drain or the plumbing wall. The best small showers work with those, not against them.
Read on for ideas you can actually use this weekend, and save the ones that spark something for your next project.
1. Swap the swing door for a sliding glass panel
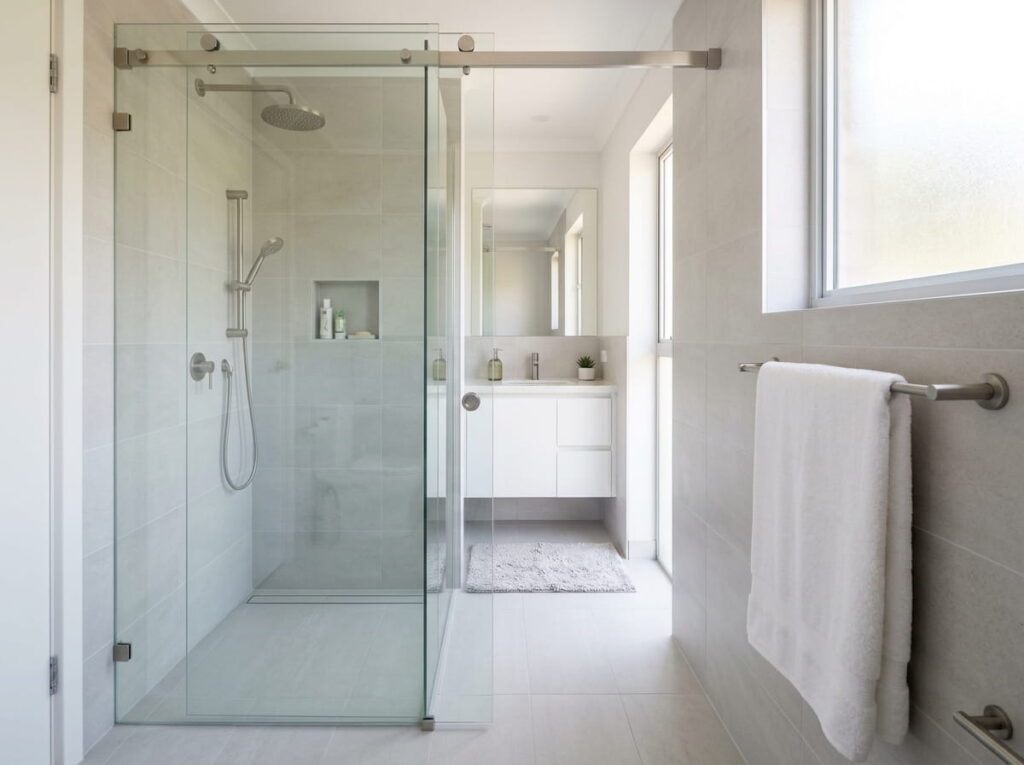
A swing door needs floor space to open, and in a tight bathroom that space is often the only clear path to the sink.
A sliding panel changes that. It rides on a track, so it never swings into your path. Here is what you get:
- A wider step in, since the opening runs the full width of the shower
- Nothing bumping the towel bar or the vanity when the door moves
- Fewer hinges and handles where soap scum likes to hide
The biggest win is quiet. Nothing swings back and forth while someone brushes their teeth, and the whole room feels calmer. Before you buy, check that the track can mount into solid framing, since it carries the weight of the glass.
A swing door cuts into the floor you need to reach the sink.
A sliding panel rides on a track and leaves the floor clear.
2. Pick clear glass over frosted or patterned panels
Frosted glass feels private, which is why so many people pick it. In a small shower, though, it can make the stall feel like a box.
Clear glass lets your eye travel past the panel to the wall and tile beyond. That depth is what makes a narrow stall feel bigger.
Clear glass tends to be the better choice when:
- The shower is visible from a hallway or the bedroom door
- You want the tile on the back wall to be the feature
- The bathroom is already short on natural light
If privacy really matters, a narrow frosted band at eye height works well. The rest stays open.
💡 Quick Tip
Ask for low-iron glass if you want true clear edges. A narrow frosted band at eye height keeps privacy without boxing in the stall.
3. Run one floor tile from the bathroom into the shower
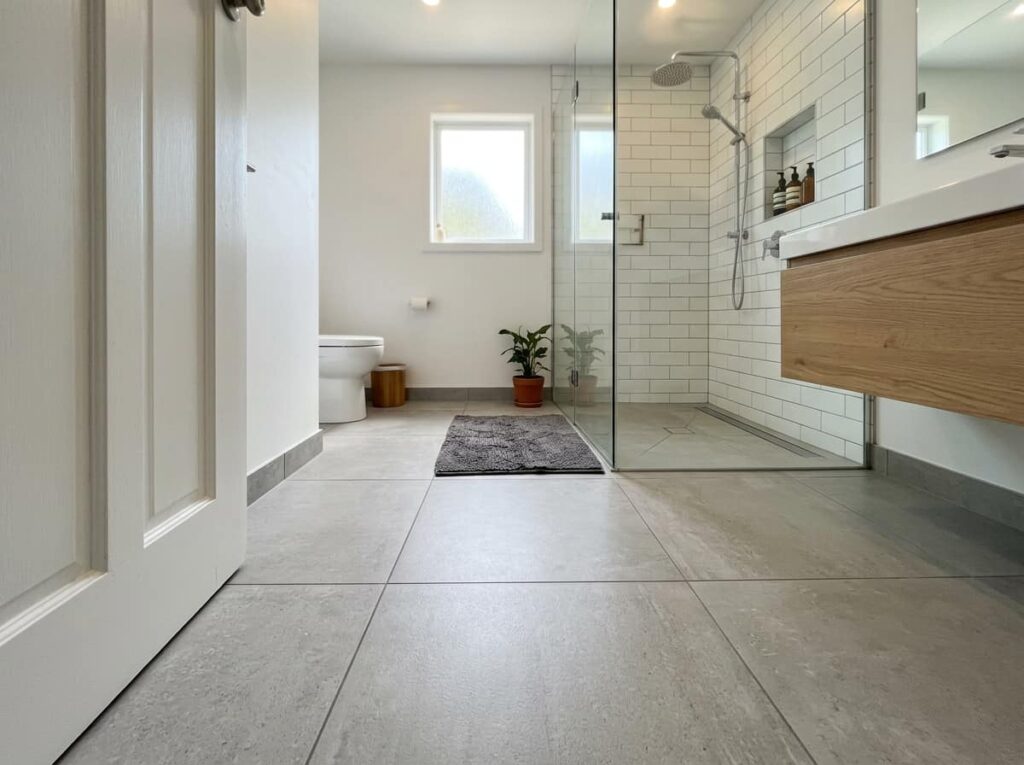
Look at where the bathroom floor ends and the shower begins. That line is what chops the room into pieces.
Run the same floor tile straight into the shower area, then keep these in mind:
- Line the grout up with the bathroom floor so the seams do not wander
- Choose a matte or textured finish on the shower floor, since glossy tile gets slick when wet
- Keep the tile size the same across both zones so the pattern stays calm
That one continuous surface makes the room read as one space, not two small rooms squeezed together.
4. Put a linear drain along the back wall
Put the drain on the wall you face when you stand under the water.
A standard drain sits in the middle of the floor, so every tile slopes toward one point. A linear drain is a slim channel along a single wall. The floor only needs to slope one way, which keeps the tile flatter and the layout cleaner.
Installation is more involved than a round drain, so raise these with your plumber early:
- How much slope the floor needs
- How they will reach the drain body if it ever clogs
Then confirm the layout before the tile goes down.
Run the drain along the wall you face in the shower.
Slope the floor toward that single line in one direction.
Set the tile so the grout lines run toward the drain edge.
5. Carve a recessed niche instead of hanging a caddy

Start with the wall that gets the least splash, then carve a recessed niche into it.
A hanging caddy takes up corner space and collects gunk on its hooks. A niche tucks shampoo into the wall itself, so the floor and corners stay open.
Plan it before the walls close:
- Frame it between two studs so the structure stays strong
- Set the shelf at shoulder height so you reach it without bending
- Seal it with the same waterproof finish as the rest of the shower
Give the bottom a slight slope or a small lip so bottles do not roll off.
Scan the wall for pipes and wiring before you cut.
Slope the niche bottom slightly so the bottles do not roll.
Making the opening wider than the studs allow, which weakens the frame.
Leaving the edges unsealed, so water finds its way behind the tile.
6. Choose a fold-down seat that tucks away when unused
A permanent bench looks generous on the plan, then eats a foot of floor once you stand in the stall.
A fold-down seat gives you a place to sit while shaving or washing your legs, then flips flat against the wall when you are done. It makes the most sense when someone in the house needs a seat some of the time and the stall is too narrow for a fixed bench.
Check before you buy
The blocking matters most. A seat that wobbles under load is a fall waiting to happen, so have the installer confirm the wall before the tile goes up.
7. Go curbless or low-threshold at the entry

A curbless shower has no lip at the entrance, so the floor runs straight from the bathroom into the stall. In a small room, that removes a step that often catches a foot or bumps into the toilet.
It also makes the whole space read as one piece, which is the point of this list.
The trade off is water control. The floor has to slope toward the drain, and the glass needs a tight seal along the bottom. If the floor cannot slope enough for a full curbless build, a low threshold is a middle path.
Ask a contractor to check the floor framing before you commit, since the slope has to be built in from the start.
8. Mount a slide bar showerhead instead of a fixed one
A fixed showerhead sends water in one direction. That works fine until someone shorter or taller uses the shower, and in a small stall the mismatch shows up fast.
A slide bar lets the head move up and down a rail, so the water lands where each person actually stands. Here is how the two compare:
| Fixed showerhead | Slide bar showerhead |
|---|---|
| Aims from one fixed height | Moves to suit each person |
| One bracket into the wall | A rail that needs solid mounting |
| One head to descale | A hose and bar to wipe down |
The rail needs studs or solid blocking to hold steady, so measure the wall before you pick a model.
9. Pick large-format tile with narrow grout lines
Look at a shower and the first thing you see is the lines. Every grout joint draws the eye, so fewer joints make the space look bigger.
Large format tile does that well. Look for rectified edges, which means the tile is cut so the joints can sit very thin. Ask your installer whether the walls are flat enough for big pieces, since bumps and dips show up fast on a large surface.
Fewer, larger tiles with tight grout make a small shower read as one continuous surface.
Before you buy, check that the tile is rated for wet areas and that the grout width you want is possible with the tile size you chose.
10. Run vertical tile lines up the shower wall
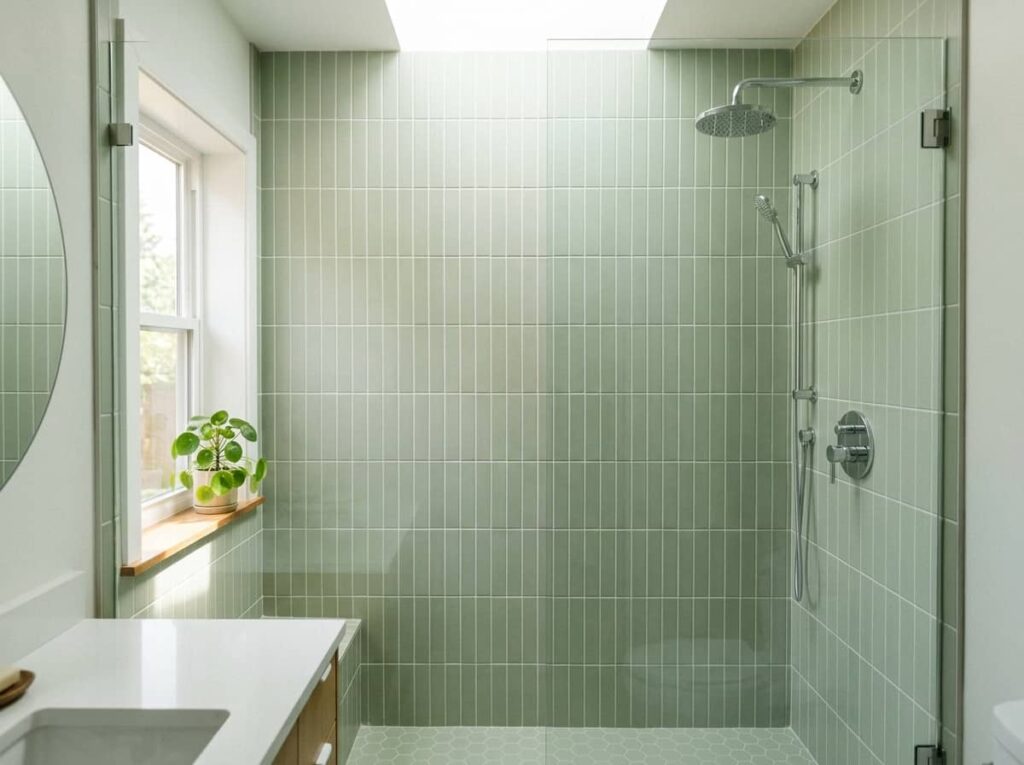
Vertical lines lift the eye toward the ceiling, and in a small stall that can make the walls feel taller.
The rule is simple: keep every joint running straight up, never across. Start the first column at the center of the back wall so any cut tiles land in the corners, where they are least visible.
- ▸Stack tiles in straight columns from the floor up.
- ▸Keep the joints lined up from one wall to the next.
- ▸Use a niche or showerhead as the center point for the first column.
11. Light the niche with a warm LED strip
Once the niche is cut, the dark inside corner becomes the first thing your eye lands on. A thin LED strip tucked under the niche lip turns that spot into a small lit shelf and makes the whole stall feel brighter.
Warm white, roughly in the 2700K to 3000K range, feels softer than the cool light many bathrooms come with. It also makes tile colors look richer. Choose a strip rated for wet or damp locations, and have an electrician route the power and place the driver outside the shower. A switch you can reach without stepping into the spray is a small detail you will appreciate every morning.
A dark niche where shampoo bottles disappear into shadow.
A warm strip lights the shelf so every bottle is easy to spot.
12. Carry one wall tone up to the ceiling
The ceiling is the fifth wall, and most people leave it plain white without thinking about it.
When the ceiling color is far from the wall tile, the room splits into a box and a lid. Pick a shade from the same family as your tile, then go one step lighter overhead. The eye follows the color up, and the room feels taller. Use a moisture-resistant paint made for bathrooms, since ordinary flat paint can peel or stain above a shower.
📌 Good To Know
Test the color on a sample board near the shower. Bathroom light is often cooler than the light in the rest of the house, and that can shift pale tones.
13. Use a walk-in with one fixed panel
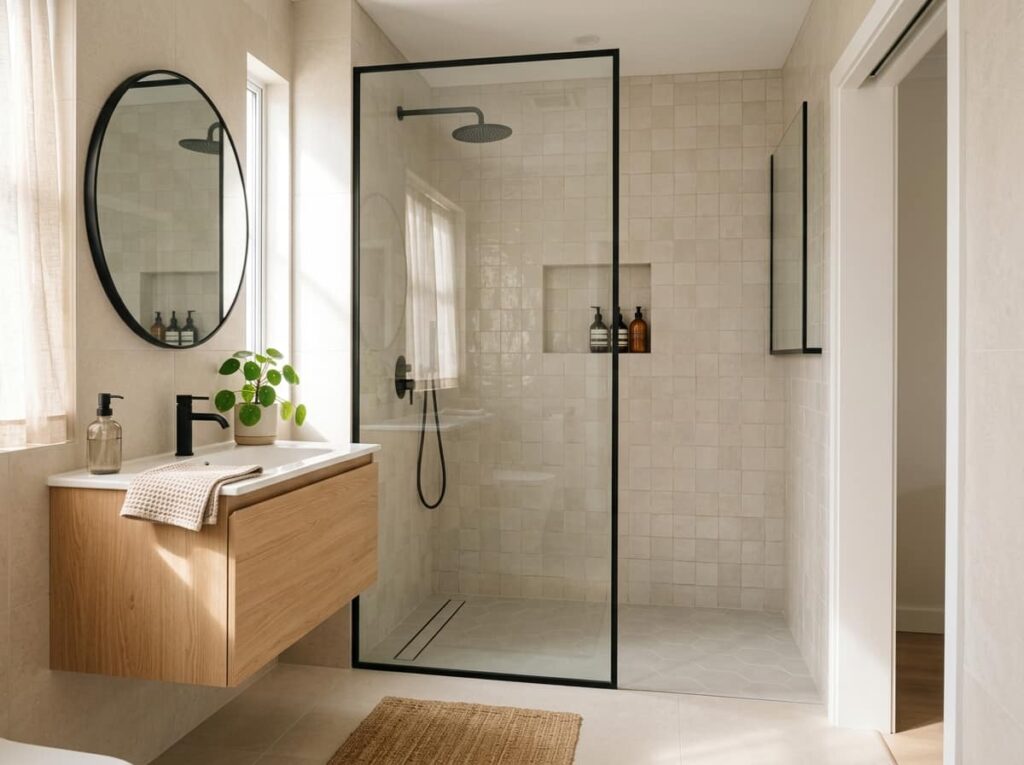
A walk-in shower skips the door and uses one fixed glass panel, leaving a wide open side where you step in. The stall stops reading as a closed box and starts to feel like part of the room.
In a small bathroom, that open side means nothing swings into the sink area or the towel bar. Water control needs a little planning. A short return panel on the open side and a floor that slopes toward the drain keep spray where it belongs.
14. Match every shower fixture to one finish
A shower with a brass valve, a chrome head, and a black shelf looks busy in a small room. Pick one finish and carry it through every metal piece you can see.
Choose brushed nickel, matte black, or chrome before you shop.
Buy the valve trim, showerhead, and arm from the same collection.
Match the drain cover, towel bar, and any grab bar to the same finish.
Pieces from one collection usually share a finish name, so check the labels before you pay. Mixing a warm metal with a cool one is what makes a small shower look cluttered, even when every piece is nice on its own.
15. Tile only the wet zone and paint the rest

Many people assume a small shower needs tile from floor to ceiling to look finished. It does not. Tile needs to cover the wet zone, and the rest of the bathroom can use a moisture-resistant paint.
The wet zone is the inside of the stall plus the walls that spray actually reaches. Above that splash line, paint does the job. The room ends up with fewer grout lines to scrub, and the tile you do install looks more deliberate. Finish the edge with a trim strip so the transition looks planned, not stopped halfway up the wall.
Conclusion
Pick the two or three changes that fix the problem you notice most each morning, and start there. Small bathroom shower ideas pay off most when they match how your household uses the room. Save this list for the next time your shower feels tight, and come back to it when you are ready to plan.
Leave a Reply