

Every time you turn around at the sink, the door catches your heel. Or the toilet paper holder finds your knee. In a small bathroom, those little bumps are not a you problem. They are a floor plan problem.
Most advice for tight bathrooms starts with baskets and paint colors. Those help a bit, but they can’t fix a room where the door, the toilet, and the shower all fight over the same few feet. The layout is where real breathing room comes from.
These small bathroom layout ideas focus on where things sit and how you move around them. You will find door swaps, fixture moves, shower changes, and one nearly free way to test a plan before anyone picks up a tool. Some ideas need a plumber. Others only need a roll of tape.
Pick the moves that fit your room and skip the rest. Not every idea works in every footprint, and that is fine.
1. Swap the Swinging Door for a Pocket Door
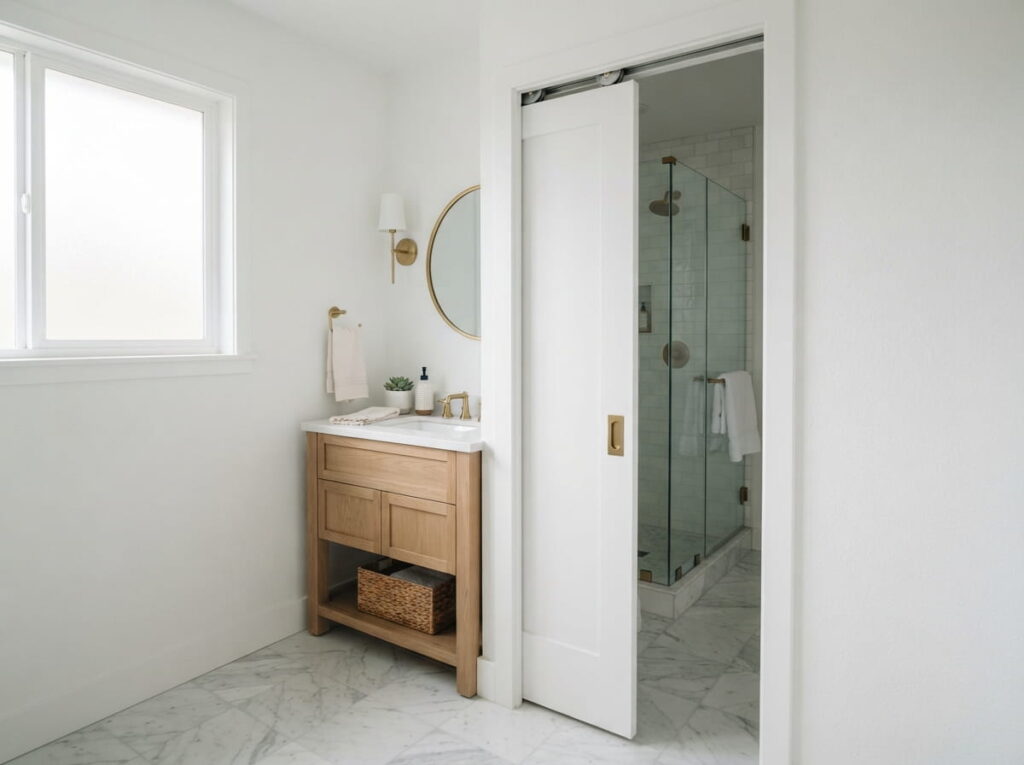
A swinging door claims a chunk of floor you can never use.
That arc stays empty every time the door is open, and in a tiny bathroom it decides where the toilet and sink can go. A pocket door slides into the wall instead, so the floor in front of it stays free for you.
Check these first:
- The wall needs an empty cavity. Pipes, wires, and vents inside it are the usual deal breakers.
- Expect a bigger job than a normal door swap, since the wall gets opened up.
- Choose one with a real latch so the room still feels private.
The door swings in and covers the floor in front of the toilet. Nothing can sit there, and two people can’t pass.
The door slides into the wall. That same floor now has room to turn around, and the sink can sit closer to the entry.
2. Rehang the Door So It Opens Against a Wall
The cheapest fix on this whole list might be a screwdriver.
Most small bathroom doors swing in and land against the toilet, the vanity, or your shins. Rehanging the door so it opens against a blank wall, or out into the hall, frees the spot it was hogging. The room does not get bigger. It just stops wasting its floor.
Work it out in three quick steps:
- Open the door all the way and note what it hits.
- Look for a blank stretch of wall it could rest against instead.
- Check the hallway side, so an outward swing does not knock into another door.
⚠️ Watch Out
An outward swing can hit someone walking down the hall. Open the door fully and have a second person walk past before you commit. Moving the hinges also means new cutouts in the frame, so plan on some wood filler and touch-up paint.
3. Line the Fixtures Up Along One Plumbing Wall
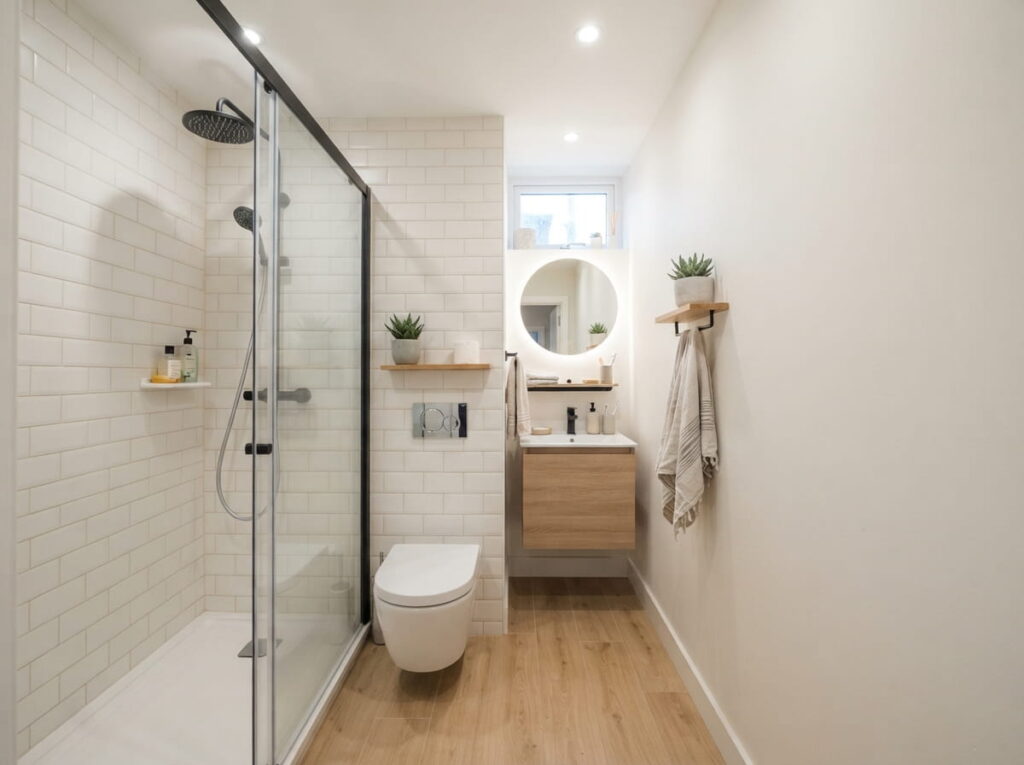
Keep the wet things on one wall.
When the shower, toilet, and sink share a wall, the supply and drain lines can run in one direction instead of crossing the room. That usually means a simpler job for your plumber. It also pushes every fixture to the edge and leaves the middle of the floor open, which is the part you actually walk on.
Bathrooms where the toilet floats in the middle and the sink faces it are often the ones where two people can’t pass each other. Ask your plumber what your drain stack allows before you draw anything.
Here is a common order, starting at the back of the room:
4. Trade the Tub for a Walk-In Shower in the Same Footprint
A tub and a walk-in shower can fit the same rectangle, but the room feels very different.
Many standard tubs run about five feet long, and a walk-in shower can often slide into that same spot. With no tall tub wall and the option of clear glass, your eye reads the floor as bigger. It is a small change with a big effect.
Before you plan the swap, settle these:
- Where the drain sits, since moving it changes the size of the job.
- Whether this is the only tub in the home, especially if kids, pets, or resale matter.
- How the shower floor will be waterproofed and sloped. This is one to hire out.
| Standard tub | Walk-in shower |
|---|---|
| Floor feel: a solid block along one wall | Floor feel: open, especially with glass |
| Best for: soaking, bathing kids, washing pets | Best for: quick daily showers and easy step-in |
| Watch for: a tall side to climb over | Watch for: waterproofing and drain slope |
5. Tuck a Corner Shower Into the Dead Corner
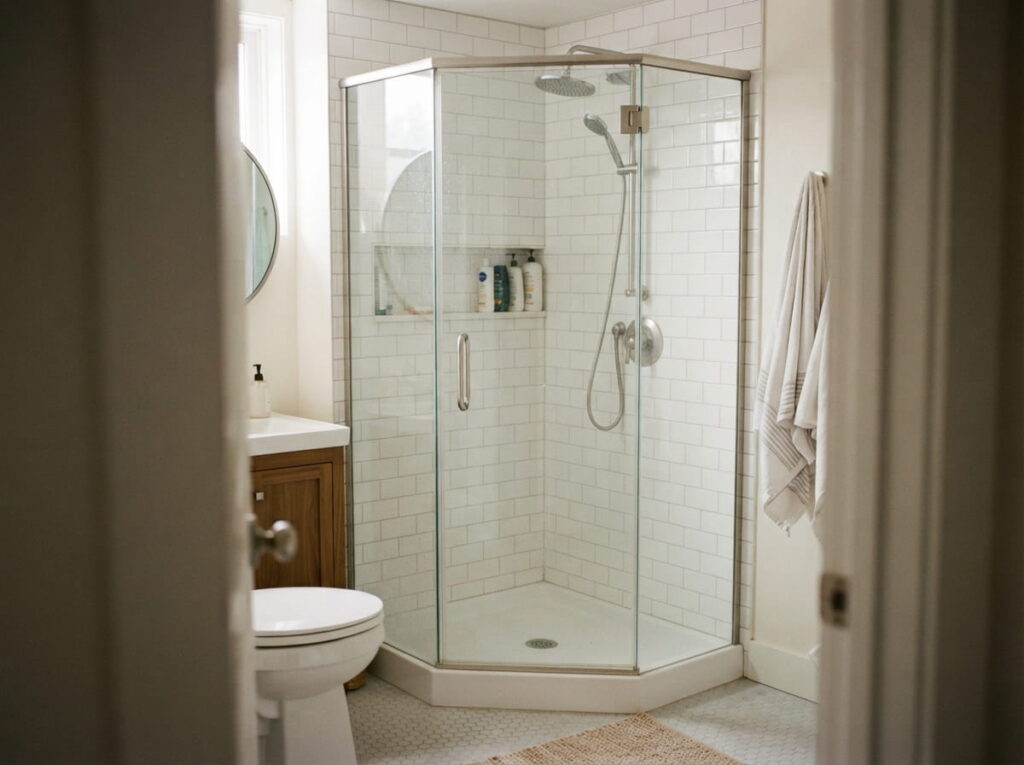
Look at the corner behind the door. The one holding a trash can and a layer of dust.
A corner shower turns that forgotten square into the wet zone, so the rest of the wall can stay open for the toilet and a walkway. Two layouts are worth comparing:
- Square corner: two glass panels, a tidy fit, and the most usable floor left over.
- Neo-angle: a diagonal front that can make room for a swing door near a toilet.
Stand in the empty corner and lift your arms like you’re washing your hair. If your elbows hit both walls, go bigger.
6. Replace the Shower Curtain With One Fixed Glass Panel
Most people assume a shower needs a full door or a curtain to keep the water in. Often it doesn’t.
A single fixed pane of glass blocks the spray and leaves the entry wide open. There is no door to swing and no curtain to cling to your leg. You can also see the whole room at once, which makes a short floor look longer.
It works best when the showerhead sits at the far end and points away from the opening. In a very short shower, some splash may still escape.
Measure before you order glass
7. Go Curbless So the Floor Runs Edge to Edge
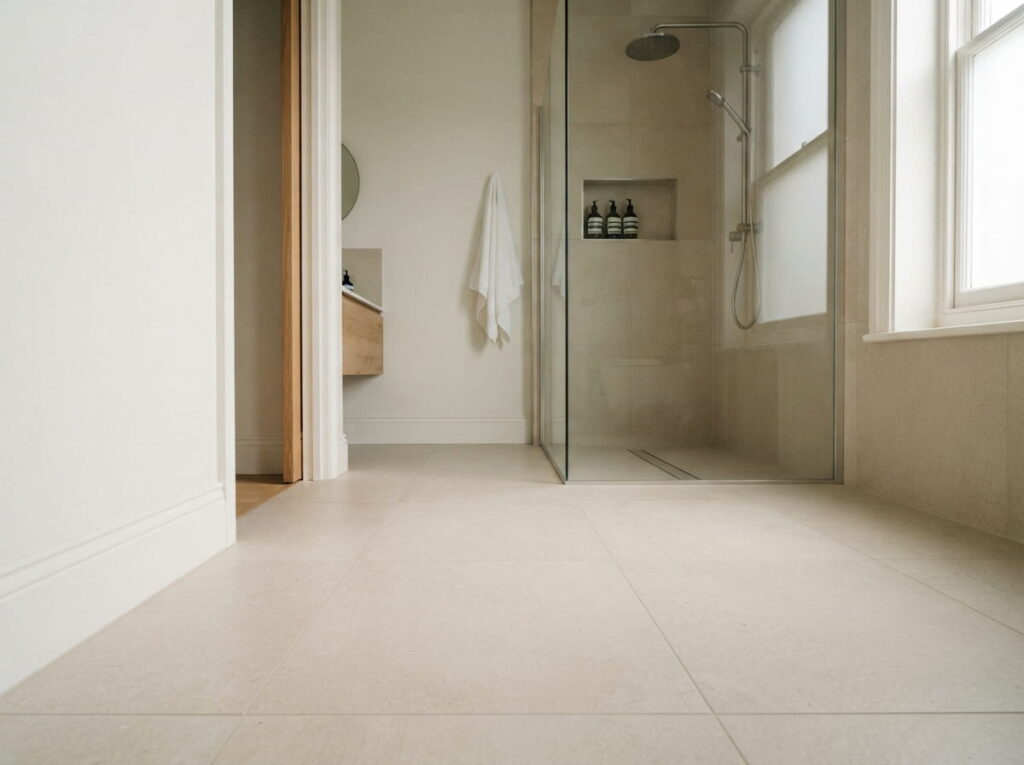
Tile runs from the doorway straight to the drain, and nothing on the floor says where the shower begins.
That unbroken line is what makes a curbless shower feel wider than it is. It is also easier to step into, which helps anyone with a bad knee or a laundry basket in their arms.
The catch is the floor itself. It has to slope toward the drain, and sometimes the subfloor must be lowered to make that happen. Small tiles or a textured finish keep the wet area from getting slick.
Curbless is a floor project first and a shower project second. Ask your contractor what it takes to slope or lower the floor before you fall for the look.
8. Move the Toilet Out of the Doorway Sightline
Open the bathroom door and look straight ahead. If the toilet is the first thing you see, the layout is working against you.
A toilet in the direct sightline makes the room feel smaller and less private, even when everything else is right. Shifting it to one side, or turning it a quarter turn so its side faces the door, gives you a better first look and more privacy for whoever is inside.
Moving a toilet drain is real plumbing work, so ask what your stack allows. If it will not budge, the door swap from idea 2 can change what you see first.
The doorway test
Stand in the hall with the door fully open and name the first three things you see.
Set a chair where the toilet sits now, then look at it from the hall and note how much shows.
Slide the chair to a side wall, or turn it a quarter turn, and look again. Pick the spot with the least on show.
9. Pick a Compact or Wall-Hung Toilet to Win Back Floor Depth
In a small bathroom, a few inches of toilet depth can decide whether you squeeze past or walk past.
Two swaps are worth pricing out:
- Compact toilet: a shorter bowl that sticks out less into the room.
- Wall-hung toilet: the tank hides in the wall and the bowl floats, so you see more floor and mopping gets easier.
Wall-hung models need a strong in-wall carrier and a wall deep enough to hold it. Check the clearance rules where you live before you settle on a spot.
Measure from the wall to the front of the bowl, not just the seat.
Confirm the wall can hold an in-wall carrier before you order.
Trusting the word “compact” without checking the listed depth.
Skipping the plumber’s opinion on where the drain sits.
10. Turn the Sink to the Side Wall to Keep the Walkway Clear
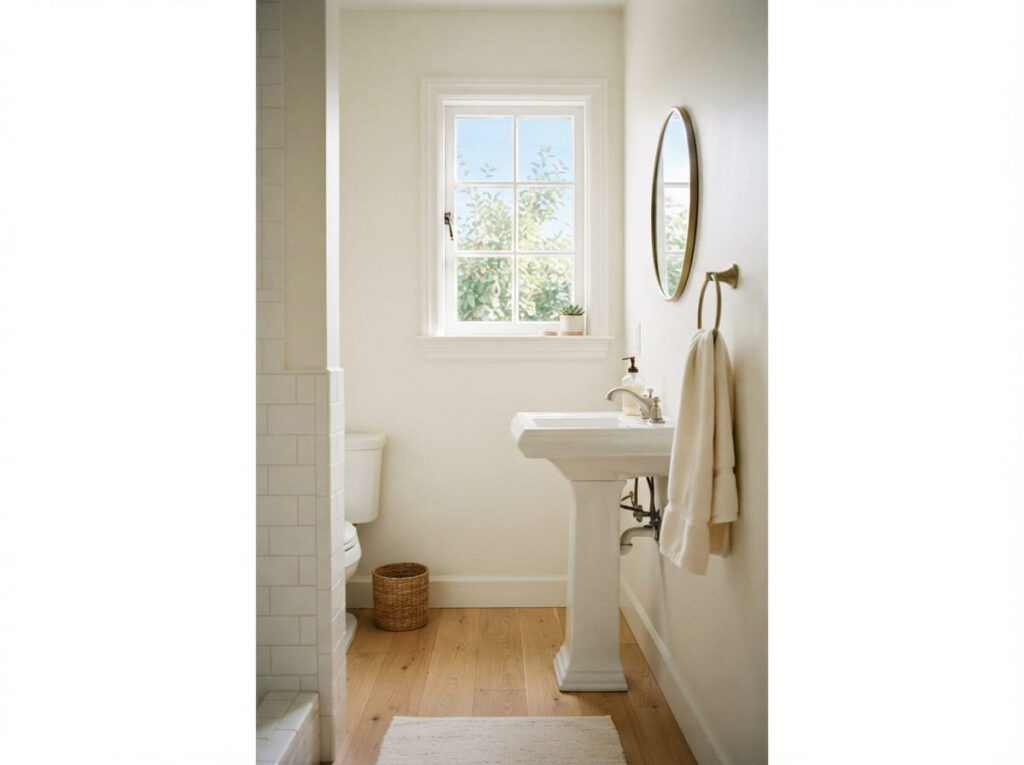
Keep one clear path from the door to the toilet and shower, and let nothing stand in it.
The sink is the usual troublemaker. On the wall you walk along, it turns every trip into a hip check. Set it on a side wall instead, off the line you walk, and two people can pass without a shuffle. Leave elbow room on both sides of the basin so you are not brushing your teeth with your arms pinned.
Only the sink’s position matters here. Which sink you buy can wait.
📌 Good To Know
Sink lines are usually easier to move than a toilet drain, so this is often the cheaper way to open up a walkway. Have a plumber confirm the run before you mark the wall.
11. Borrow a Few Inches From the Closet Next Door
The bathroom is tight, but the closet on the other side of the wall might not be.
A linen closet or a shallow hall cupboard can often give up a few inches without anyone noticing. That extra width can move a toilet off the wall it was squeezed against, or make room for a wider door. Borrowing space usually costs less than moving a whole room.
Before anyone swings a hammer:
- Find out if the wall is load bearing. Ask a pro instead of guessing.
- Look for pipes, wires, and vents hiding inside it.
- Think about what you would lose on the other side, like the shelf you use every day.
12. Make the Whole Room the Shower With a Wet Room Plan
One drain, one floor, and no shower door to clean.
That is the appeal of a wet room. The whole floor slopes toward a single drain, so the shower is simply part of the room. With no tub or tray in the way, a tiny bathroom reads as one open space.
Water will reach the toilet and the sink unless you plan around it. A fixed glass panel, or a showerhead aimed away from them, keeps most of it off. Waterproofing is not a place to save money, so hire someone who does it every week.
What a wet room needs
13. Split a Shared Bath Into a Toilet Nook and a Wash Zone
It is 7 a.m., someone is in the shower, and someone else needs the toilet.
One shared room with one door means a line in the hallway. Splitting it into a toilet nook and a wash zone lets two people use the space at once.
What the split needs:
- Enough length for a wall and a second door, so measure before you plan.
- A pocket or slim door on the nook to save floor.
- A vent plan for each zone, plus a check on wiring and lighting for the new wall.
One room and one door. Whoever is in the shower keeps everyone else waiting in the hall.
The toilet nook has its own door. The sink and shower share the other half, and two people can be in the room at once.
14. Tape the Layout on the Floor Before You Commit
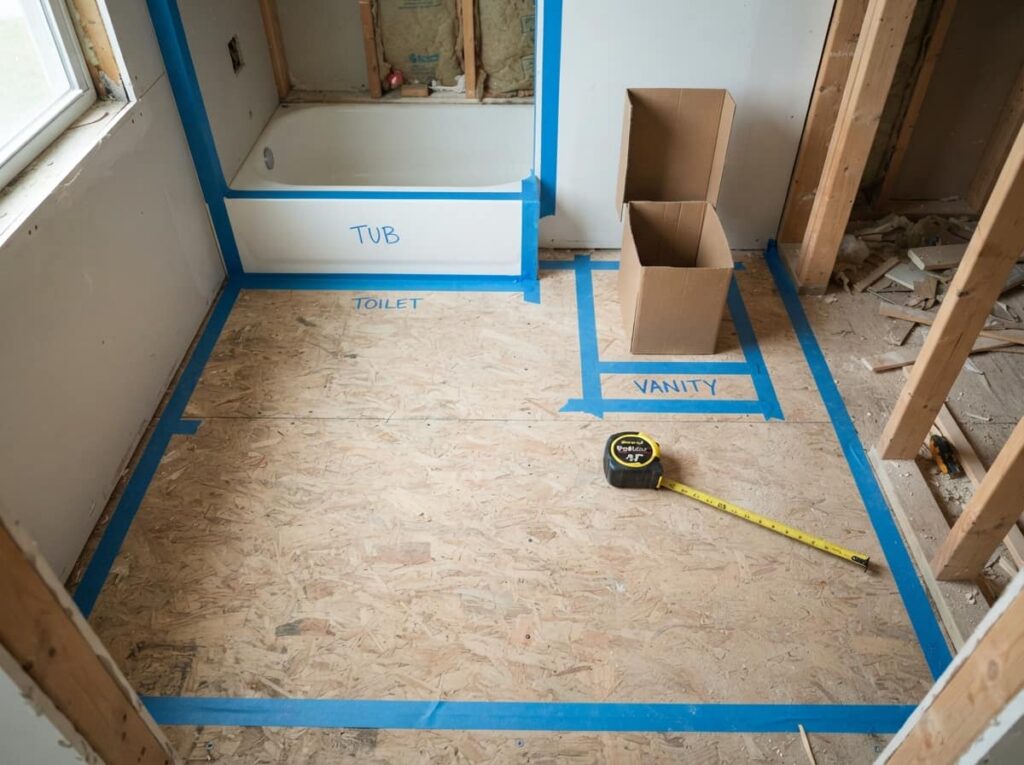
Paper plans forgive too much.
Before you buy a single fixture, mark the whole layout on the floor at its real size. You will feel a tight turn in seconds, and moving a strip of tape costs nothing. Tape out two versions if you are stuck between them.
Grab these first:
- Painter’s tape, so it lifts off the floor cleanly
- Cardboard boxes for the toilet and any other tall pieces
- A tape measure and the spec sheet for each fixture
The tape test in four steps
Tape the outline of the room, then mark the door swing or the pocket door track.
Tape each fixture at the size on its spec sheet, and stand a box where the toilet will sit.
Walk it like a normal morning. Brush your teeth, turn around in the shower spot, and reach for a towel.
Shift the tape until nothing bumps, then take a photo to share with your plumber or contractor.
Final Thoughts
A small bathroom rarely needs more square footage. It needs a floor plan that stops wasting the space it already has. Sometimes that means a door that slides, a sink that moves a foot, or a shower that stops fighting the toilet for the same corner.
Start with the smallest change that fixes your biggest bump. Rehang a door. Tape out a new plan. Then work up to the bigger jobs once you know they will pay off. The best small bathroom layout ideas are the ones you can walk through on a Tuesday morning without turning sideways.
Your first three moves this weekend
Leave a Reply