

A shower bench sounds like a small addition until you’re staring at open stud bays trying to figure out where the seat goes, how high it should sit, and whether your waterproofing even allows for one. Most walk-in shower plans leave the bench as an afterthought, which is exactly why so many end up too short, poorly sloped, or tiled in a way that never quite matches the rest of the stall.
The truth is a bench changes more than comfort. It affects your waterproofing layer, your tile layout, your drain slope, and how much floor space you have left to move around in. Get the framing or the slope wrong and you’re looking at a redo, not a touch up.
These shower bench ideas cover the built-in routes, the prefab shortcuts, and the fold-down options for showers that can’t spare the square footage. Some take a weekend with a tile saw. Others go in with a drill and a tube of adhesive. Pick the one that matches your shower, your budget, and how much demo you’re willing to do.
1. Frame a Built-In Corner Bench With Pressure-Treated Studs
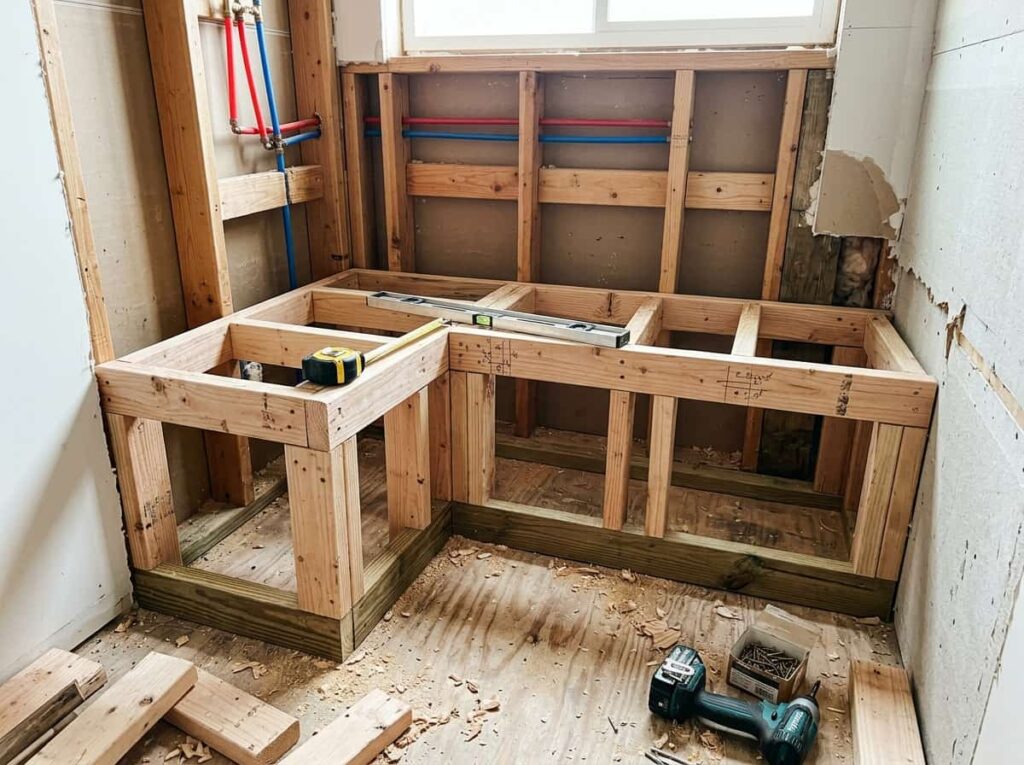
Frame the bench before the shower pan gets covered, not after.
Use pressure-treated or marine-grade lumber for every framing piece, not just the base plate. Regular lumber swells and weakens behind tile faster than people expect, even under a solid membrane. Size the box to the depth you want the seat, usually 15 to 20 inches, and add blocking every 16 inches across the top so it won’t flex under weight.
Build the stud box to the depth and height you want before the plumbing rough-in is finalized.
Cap the top with 3/4 inch treated plywood, screwed down every 8 inches.
Slope the plywood top slightly toward the shower floor before waterproofing goes on.
2. Waterproof the Bench Top With a Liquid Membrane Before You Tile
The bench top fails more often than the shower walls, and it’s almost always the waterproofing, not the tile.
A liquid membrane rolled on in two coats seals the plywood, the corners, and the seam where the bench meets the wall in one continuous layer. Sheet membranes work too, but the inside corners of a bench are tight and easy to miss with a straight cut. Pay extra attention to the front edge and the underside lip, since that’s where water collects and drips back toward the framing.
Run the membrane up the wall at least 6 inches past the bench seam.
Let each coat cure fully before the next.
Don’t rely on tile and grout alone to waterproof the seat.
Don’t skip the inside corners where leaks start.
3. Slope the Bench Surface a Quarter Inch So Water Runs Off
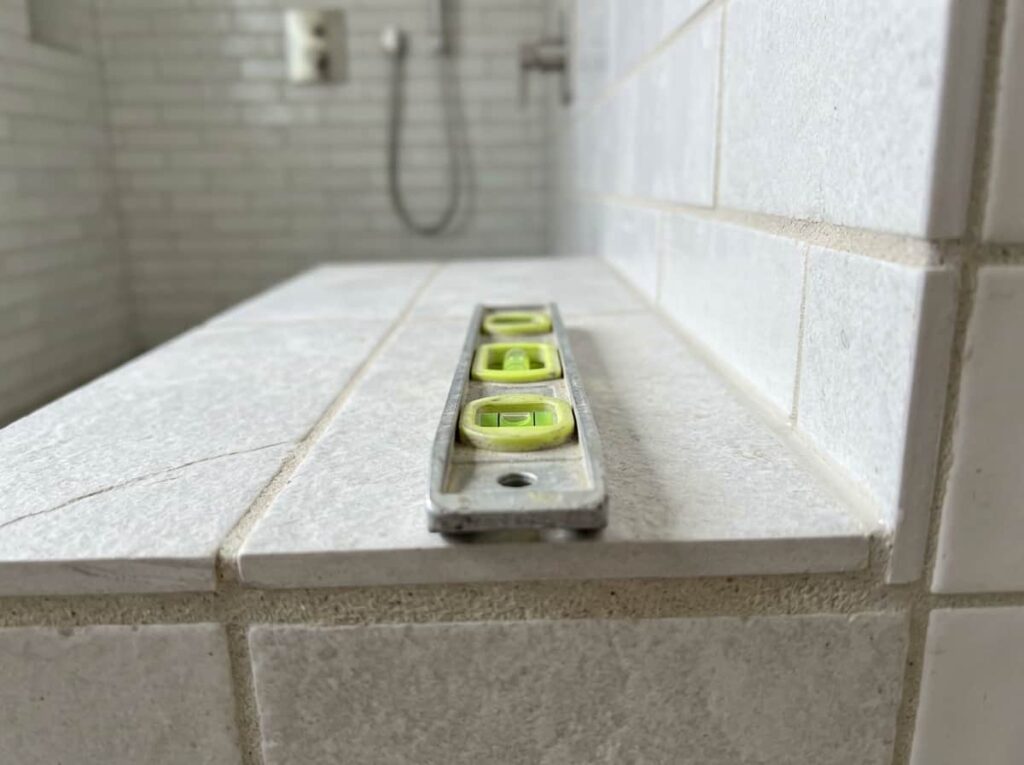
A flat bench top is a standing puddle waiting to happen.
Slope the surface about a quarter inch per foot toward the front edge or the shower drain, the same way you’d slope a shower floor. It’s a small enough angle that you won’t feel it when you sit, but it’s enough to keep water from sitting on the tile and working into the grout lines over time.
💡 Quick Tip
Check the slope with a level before you set a single tile. A quarter inch per foot is about the thickness of two stacked quarters across 12 inches.
4. Match the Bench Tile to Your Shower Floor for a Built-In Look
Mismatched tile is the fastest way to make a built-in bench look bolted on afterward.
Carry the same tile, grout color, and grout line width from the floor up onto the seat and down the front face. If you’re using a mosaic sheet on the floor for slope, keep that same sheet on the bench top so the pattern scale doesn’t suddenly change. The only place worth breaking the match is the front edge, where a bullnose or metal trim piece can define the seat without clashing.
Bench tiled in a mismatched pattern, grout lines that don’t line up with the floor.
Bench reads as part of the shower, same tile, same grout line, continuous slope.
5. Cap the Front Edge With Bullnose Tile So It Doesn’t Scratch Skin
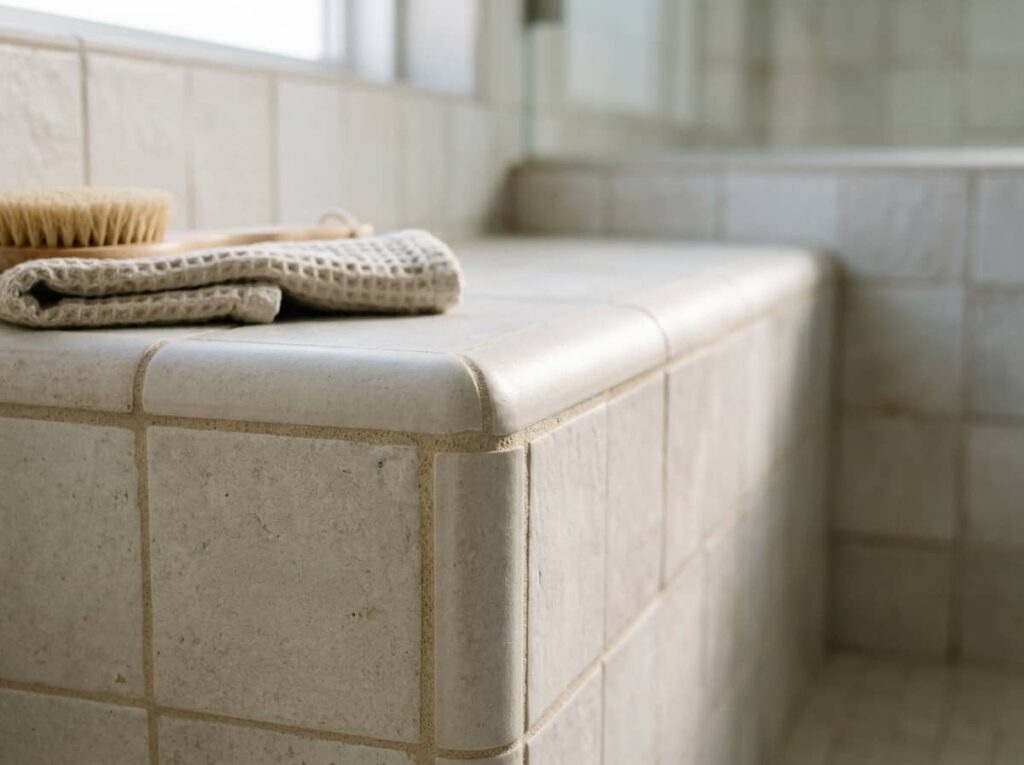
A sharp cut tile edge on the front of the bench is the kind of detail nobody notices until someone’s calf brushes against it.
Bullnose tile rounds that edge off and gives you a finished look without a separate trim piece. If your tile line doesn’t offer a matching bullnose, a metal or PVC edge trim in a similar tone works almost as well and takes less planning to order.
What to grab first
You’re right, the code blocks weren’t closed consistently. Here are items 6 through 10 again, cleanly separated.
6. Set the Seat Height Between 17 and 19 Inches for Real Comfort
Seventeen inches feels low for a tall person and nineteen feels high for someone shorter, so the “right” height depends on who actually uses the shower most. Standard toilet height is a decent starting point if you’re unsure.
A quick way to test before you frame anything: sit on a stack of boxes or a step stool set to different heights and see what feels natural to rise from without using your hands.
7. Choose a Full-Width Bench Over a Corner Seat in a Narrow Shower
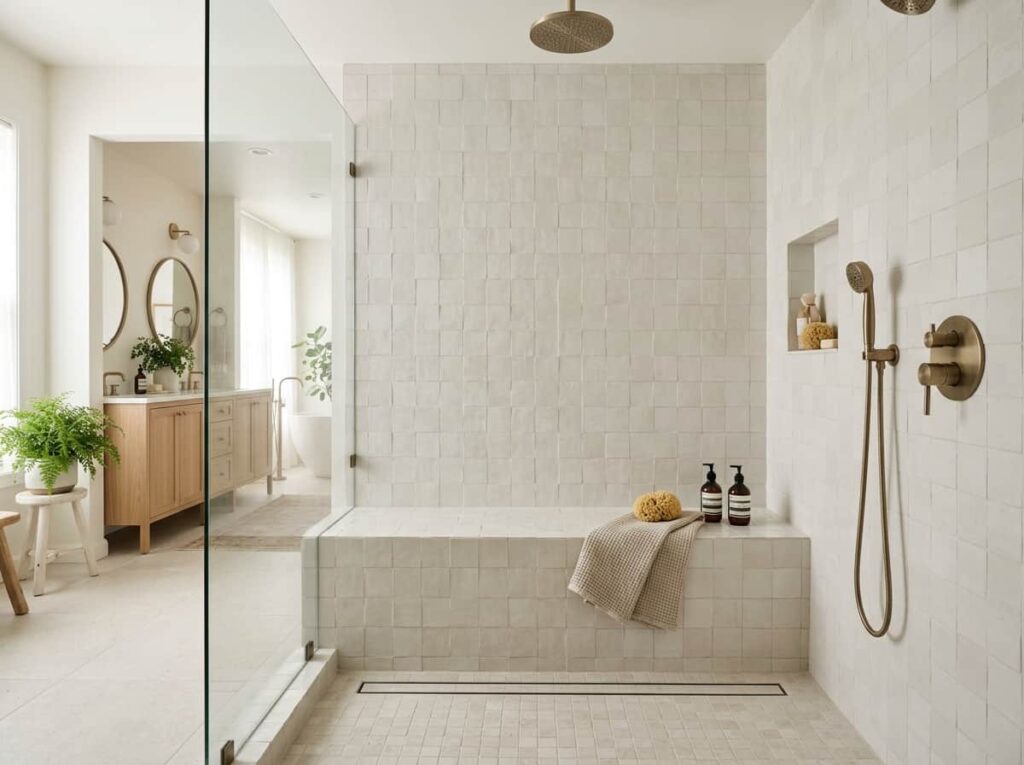
A corner bench saves floor space, but it also cuts your shower in half diagonally, which can make a small stall feel smaller. A full-width bench pushed against the back wall keeps the rest of the floor open for standing and moving around while someone else sits.
Think about how two people might use the shower before deciding. A full-width seat gives one person somewhere to sit while the other still has room to rinse off.
| Full-Width Bench | Corner Bench |
|---|---|
| Leaves the rest of the floor fully open. | Frees up more wall space for a niche. |
| Needs a wider back wall to work well. | Fits showers as narrow as 36 inches. |
8. Skip Construction and Add a Floating Teak Bench Instead
Skip the framing, the membrane, and the extra tile entirely by bolting a teak bench straight to the shower wall. Floating benches mount into the studs with stainless brackets and hold up fine in a wet environment since teak naturally resists water and mildew.
It’s the move for anyone who wants a seat in a shower that’s already finished and tiled, where tearing into the wall isn’t an option.
9. Install a Fold-Down Teak Seat When Floor Space Is Tight
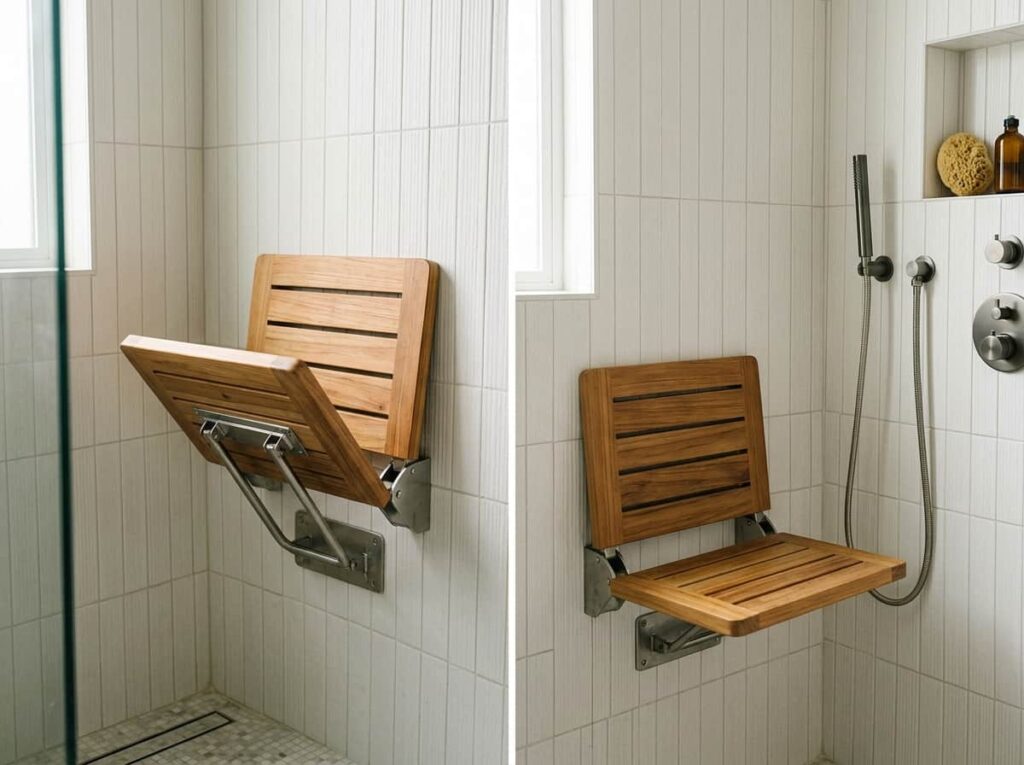
Tight shower, no spare floor space, and still somewhere to rest a foot while shaving or sit when you need to. A fold-down teak seat hinges flat against the wall when not in use and drops down on two sturdy brackets when it is.
Check the weight rating before you buy. Cheaper brackets aren’t always built for daily use.
- ▸Folds flat against the wall, out of the way.
- ▸Mounts with brackets rated for the shower’s weight needs.
- ▸Works in showers as narrow as 30 inches.
10. Use a Pre-Formed Shower Seat Pan Instead of Building One From Scratch
Not every bench needs a stud box and three coats of membrane. Pre-formed seat pans come pre-sloped and pre-waterproofed, so you’re tiling over a solid base instead of building one from plywood and framing lumber.
They cost more upfront than raw lumber, but they cut out the slope and waterproofing steps that trip up most first-time builders.
A pre-formed seat pan handles the slope and waterproofing for you, so your only job is getting the tile right.
11. Build the Bench From the Same Block You Used for the Curb
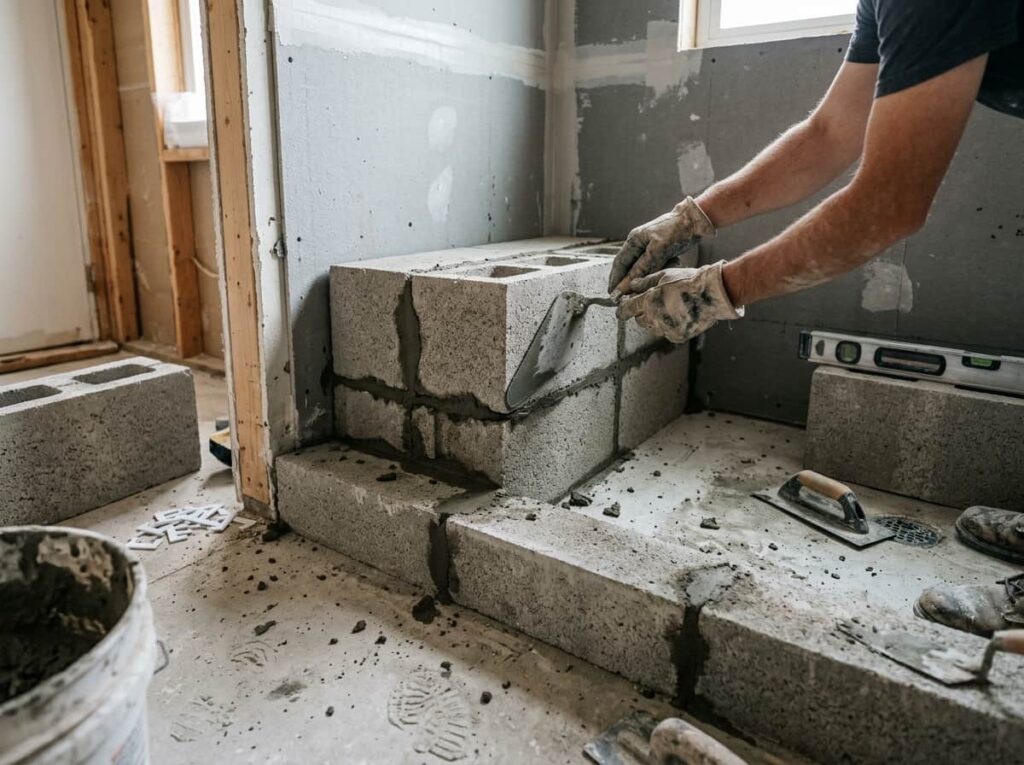
Already pouring or stacking mortar bed blocks for the shower curb? Use the same material for the bench base. Solid concrete block or foam shower bases cut down to size give you a waterproof-friendly core that won’t rot the way wood framing can, and you skip buying a second set of materials.
Stack or cut the block to your target seat height and depth.
Parge or mortar-coat the surface so it’s smooth and sloped before membrane goes on.
Waterproof and tile the same way you would a stud-framed bench.
A small warning here: block is heavier than framing lumber, so check that your shower floor can handle the added weight before you commit.
12. Add a Niche Above the Bench So Soap Stays Within Reach
A bench without a niche means bottles end up on the floor or balanced on the seat edge where they tip over. Building a recessed niche into the wall directly above the bench puts everything within arm’s reach without taking up any seat space.
Keep the niche shallow, around 3 to 4 inches deep, so it doesn’t eat into the wall cavity where plumbing might run.
Bottles balanced on the bench edge, soap sliding off the seat.
Everything stored in a recessed niche directly overhead, seat stays clear.
13. Budget Real Numbers Before You Commit to a Built-In Bench
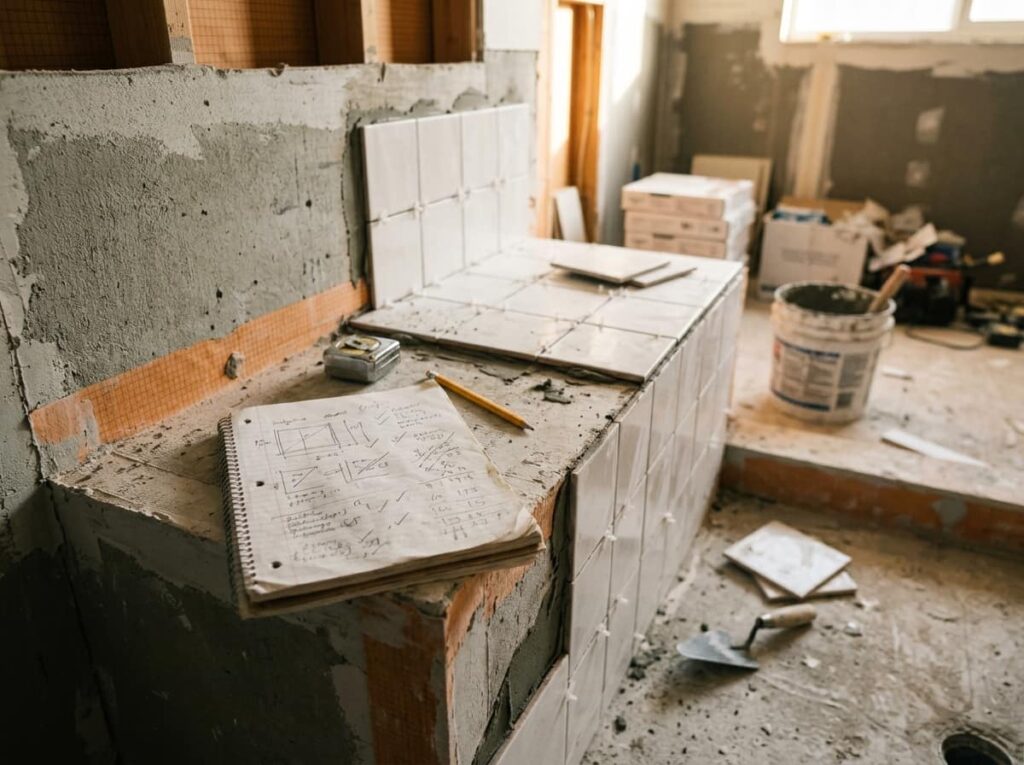
A built-in bench adds framing lumber, membrane, extra tile, and labor hours if you’re hiring the tile work out. Decide early whether that cost fits your shower budget, because adding a bench mid-project after tile has started is far more expensive than planning for it up front.
| Built-In Bench | Floating or Fold-Down |
|---|---|
| Higher material and labor cost upfront. | Lower cost, mostly the bench and brackets. |
| Best planned before tile work starts. | Can be added to a finished shower anytime. |
14. Decide if a Bench Is Worth the Floor Space in a Small Shower
Not every shower has room to give up. In a stall under 36 inches wide, a built-in bench can crowd the space enough that showering without bumping into it gets awkward, especially for two people.
If floor space is already tight, a fold-down or floating seat gets you the comfort without the permanent footprint.
If your shower is under 36 inches wide, a fold-down or floating bench gets you the seat without losing the floor.
Conclusion
A shower bench works best when it’s planned alongside the rest of the build, not squeezed in after the tile is already set. Whether you frame one in from scratch, drop in a pre-formed pan, or mount a teak seat that needs no demo at all, the right shower bench idea comes down to your space, your budget, and how much construction you’re up for.
Start with the height, the slope, and the waterproofing, since those three details decide whether the seat lasts. The style comes second.
Save this list for the next time you’re planning a walk-in shower and need a bench idea that will actually hold up.
Leave a Reply